As a performer, [Steve Albini] fronted Shellac and Big Black, two indie-rock bands that pushed punk and noise past absurd and abrasive limits. Albini famously did not like to be called a “producer,” but he worked on — by his own estimate — “a couple thousand” records as a recording engineer, including classics like the Pixies‘ Surfer Rosa, Nirvana's In Utero and PJ Harvey's Rid of Me.
I can’t say I’ve listened to anywhere close to a couple thousand Steve Albini records, but I’ve listened to and loved a ton of them. This one may be my favorite.
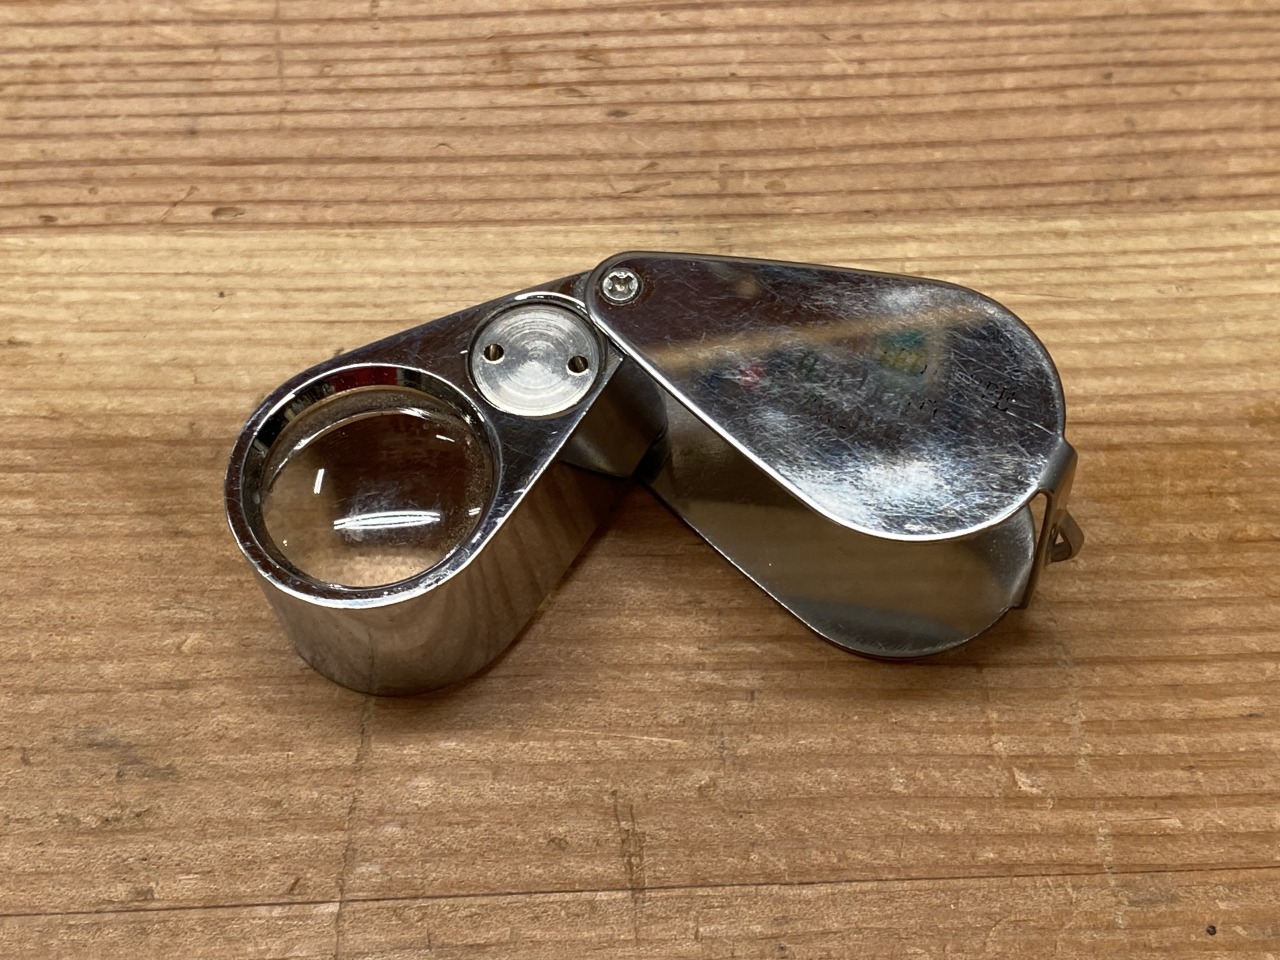
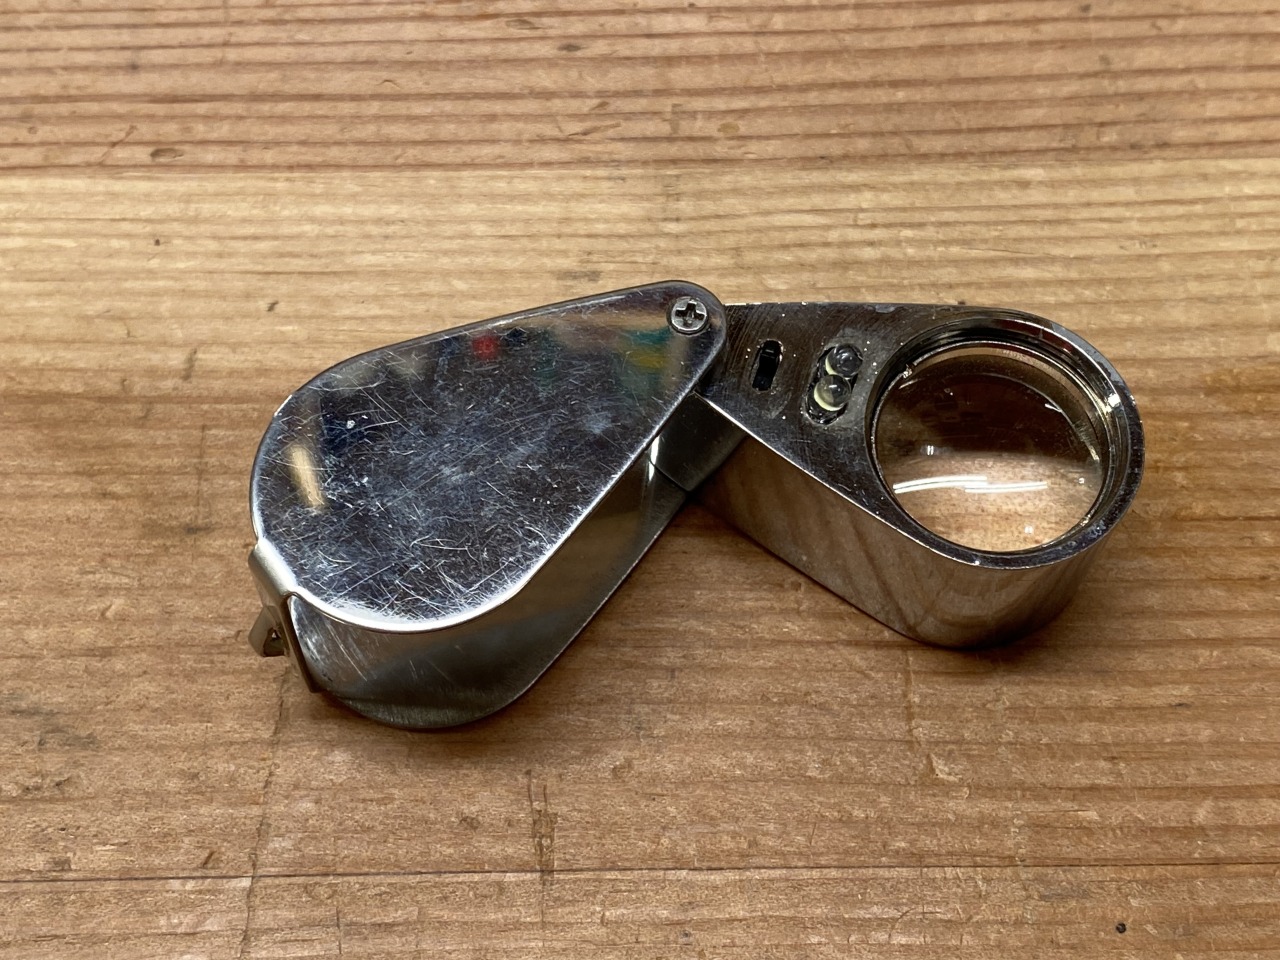
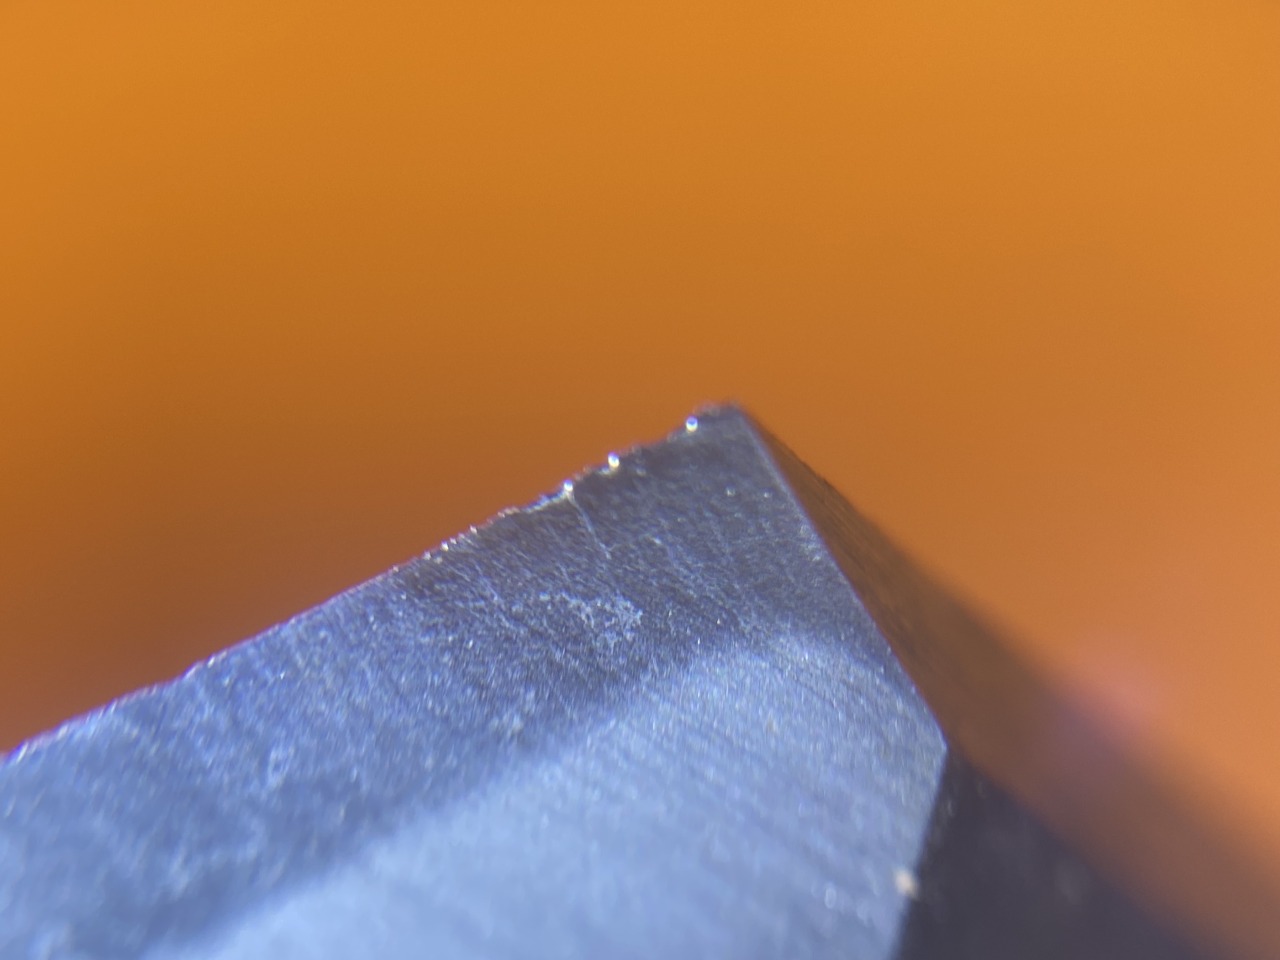
When sharpening, here’s the best method I know of to see what’s going on with the tool. It’s a jeweler’s loupe, with a built-in LED.
These are ridiculously inexpensive. If you go to eBay, and do a search for “20x led loupe”, a ton of search results will come up. Today (6 May 2024), I found one for $7.99, shipped to my door.
There’s often chatter about woodworkers looking at their edges with a magnifying glass, as if it was a bad thing, a sign of OCD, or a waste of time. I think it’s the most direct way of seeing what happens to your edge as you sharpen, and a faster way of seeing if you have a sharp edge than feeling for a burr, looking for the line of light, or any other of the more acceptable methods.
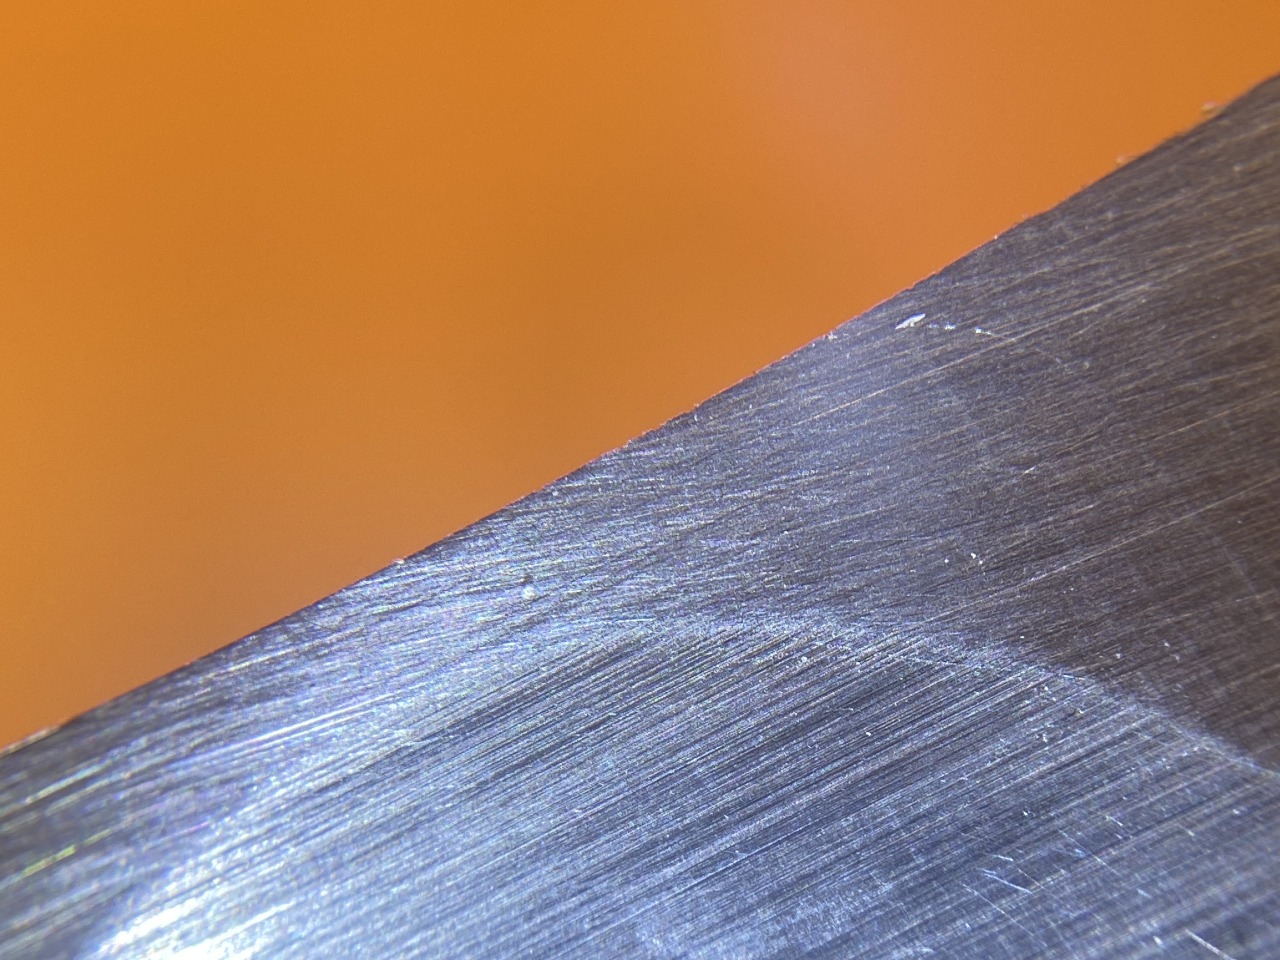
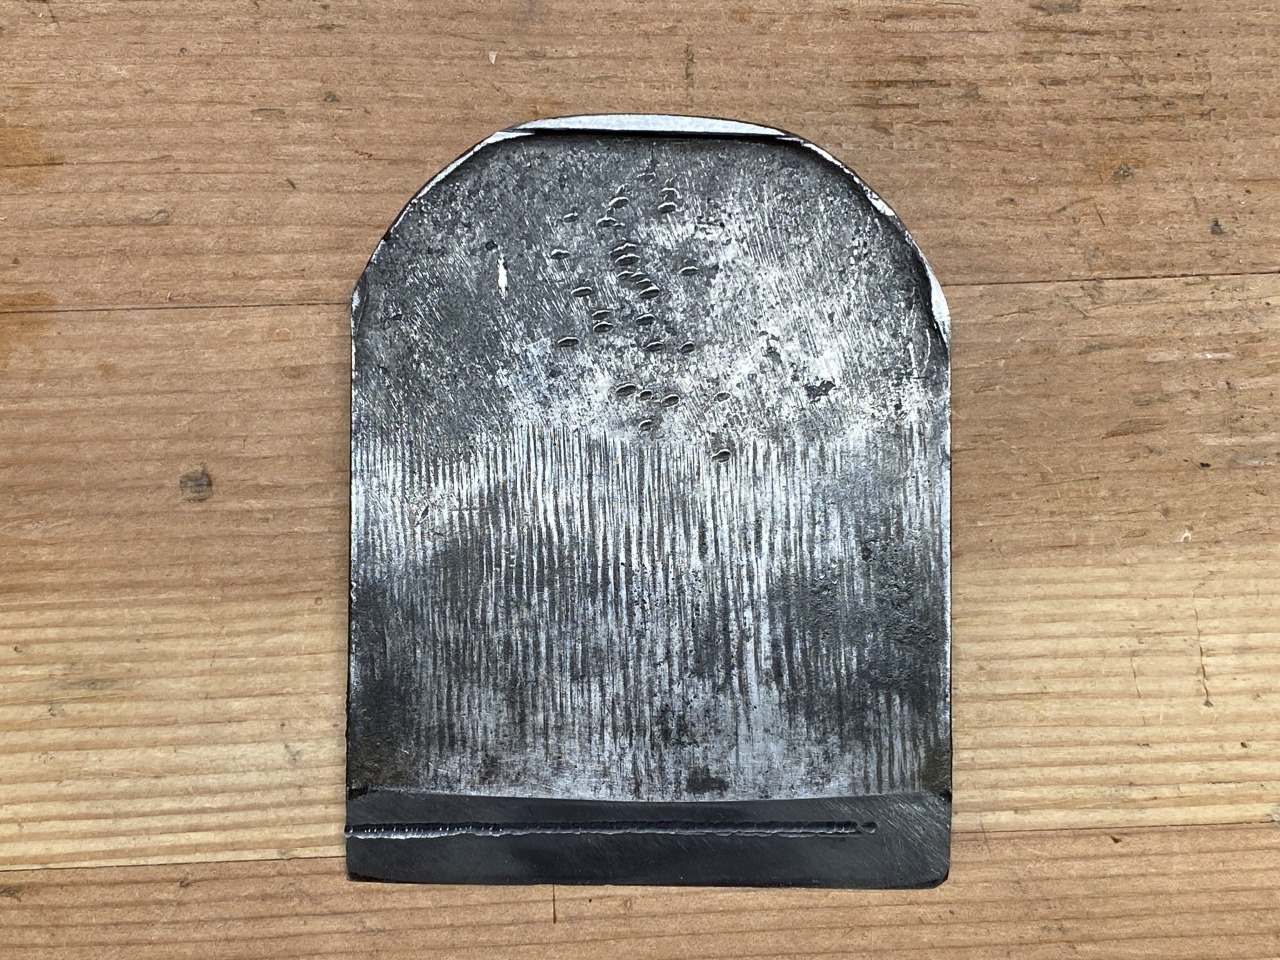
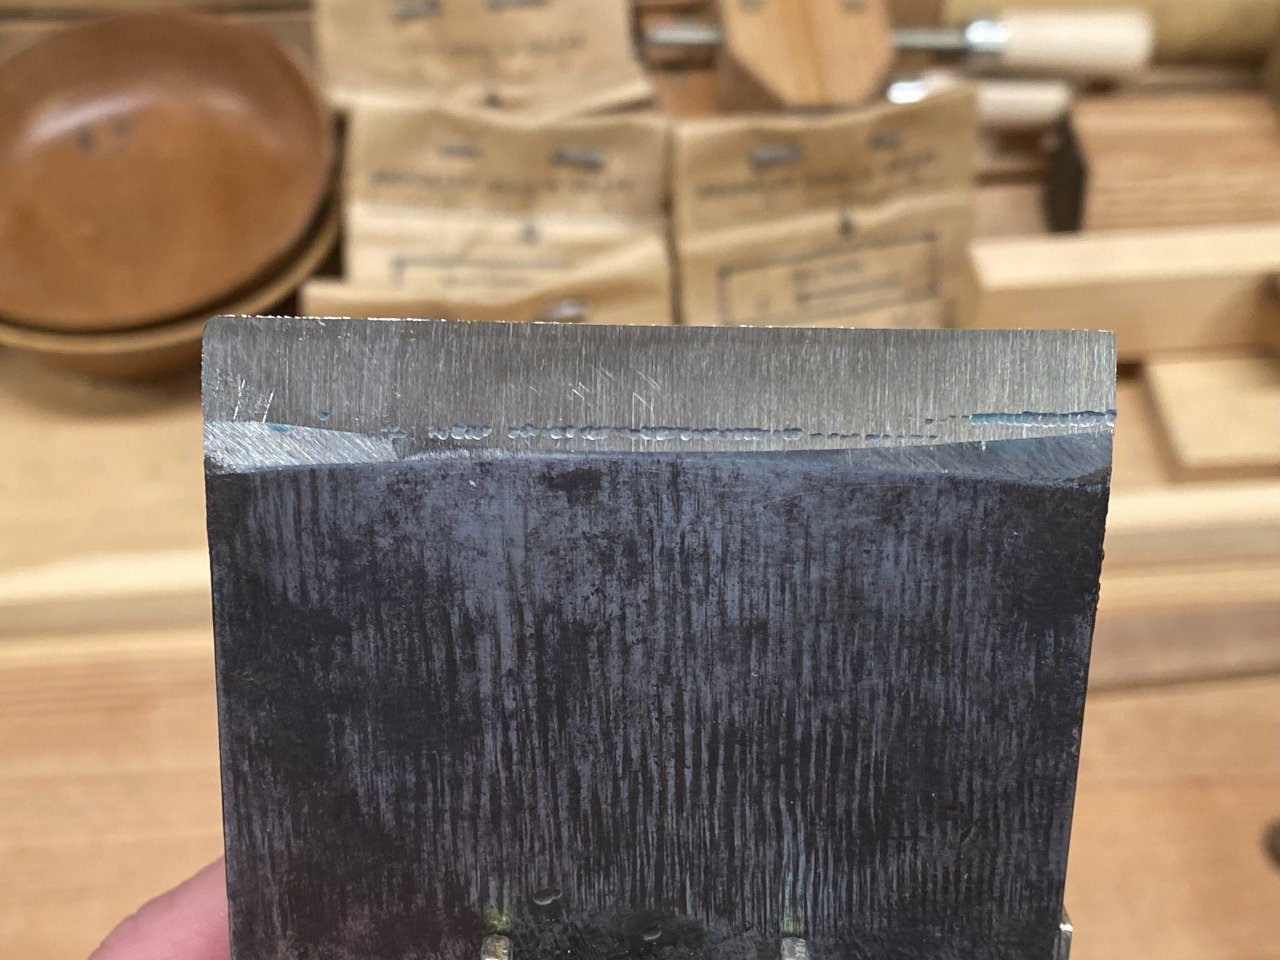
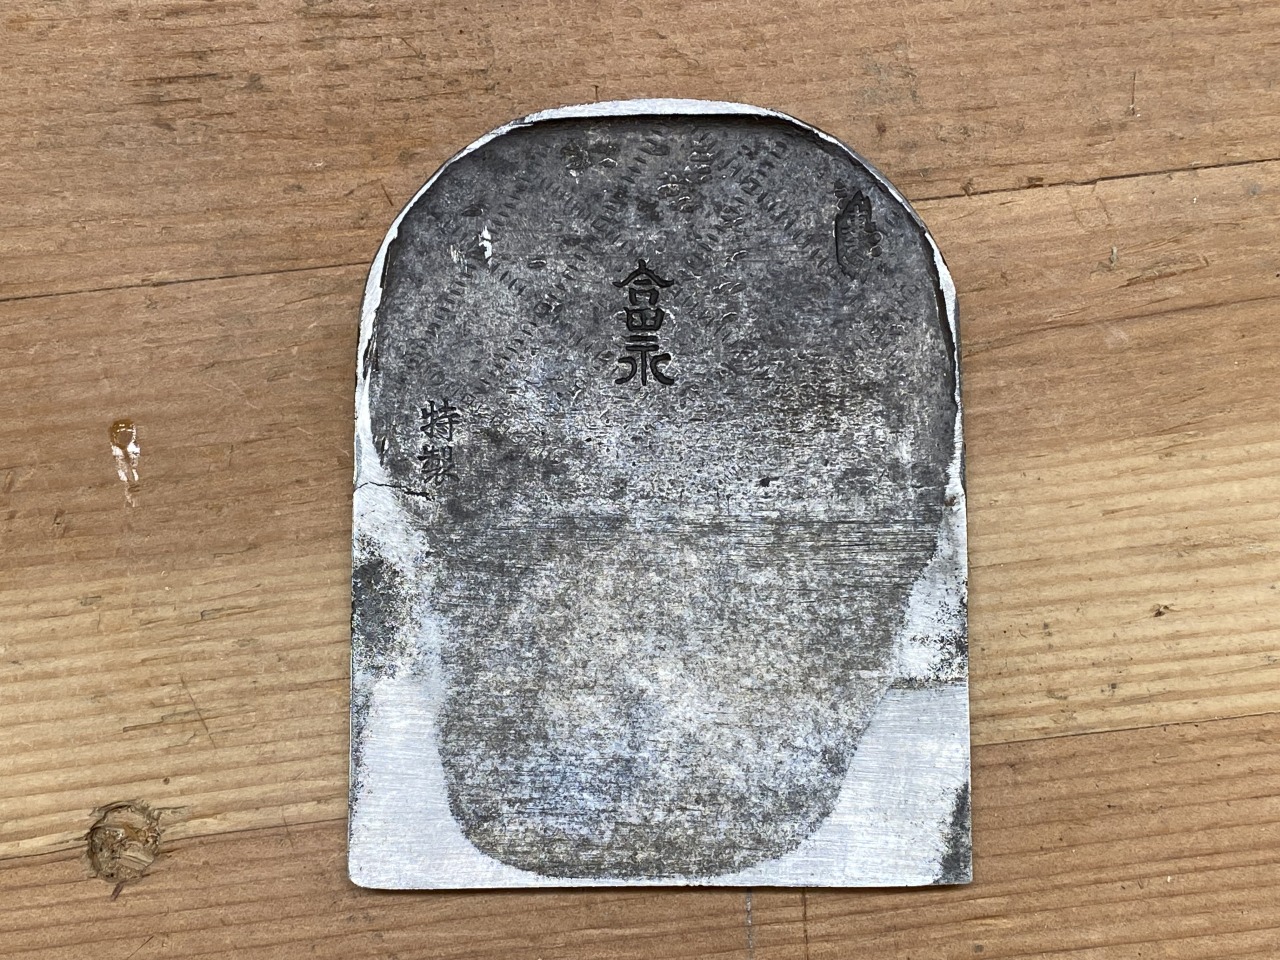
Here’s an example of what you can see when you use one of these loupes. This is the back of a 24 mm Japanese chisel after I’ve used a 1000 grit waterstone on it. You can see the scratches from the waterstone on the back.
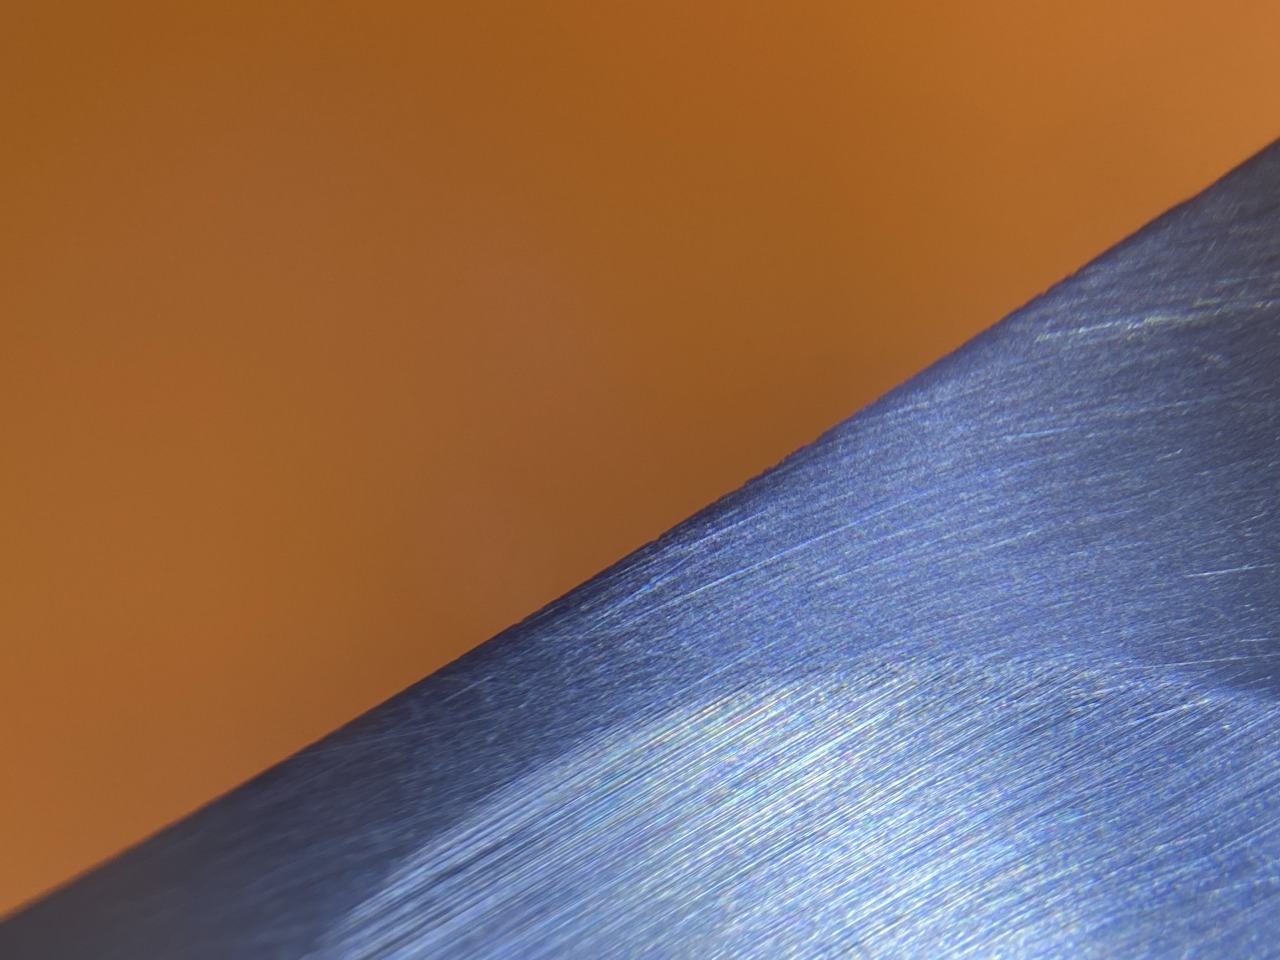
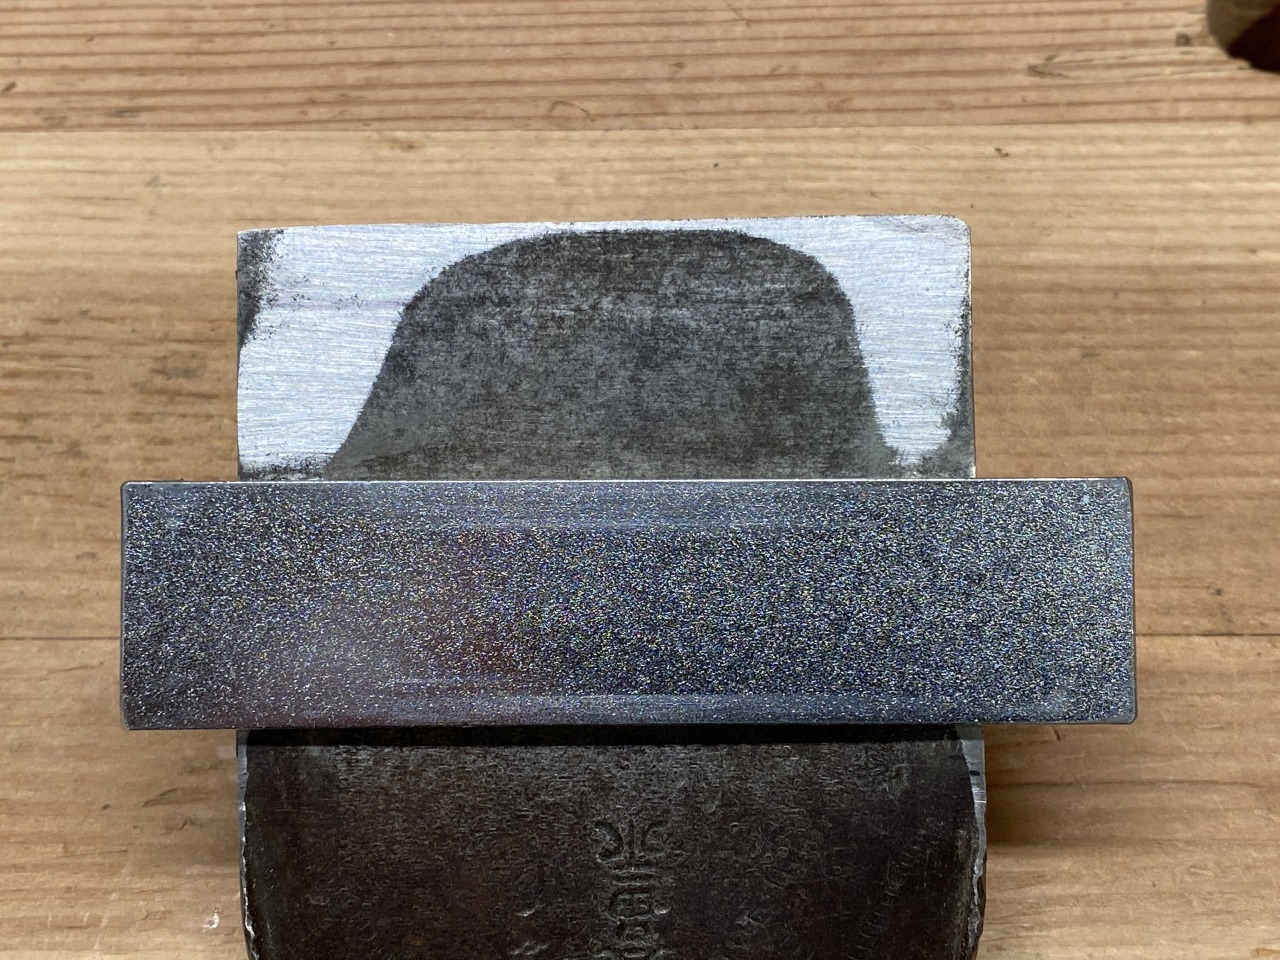
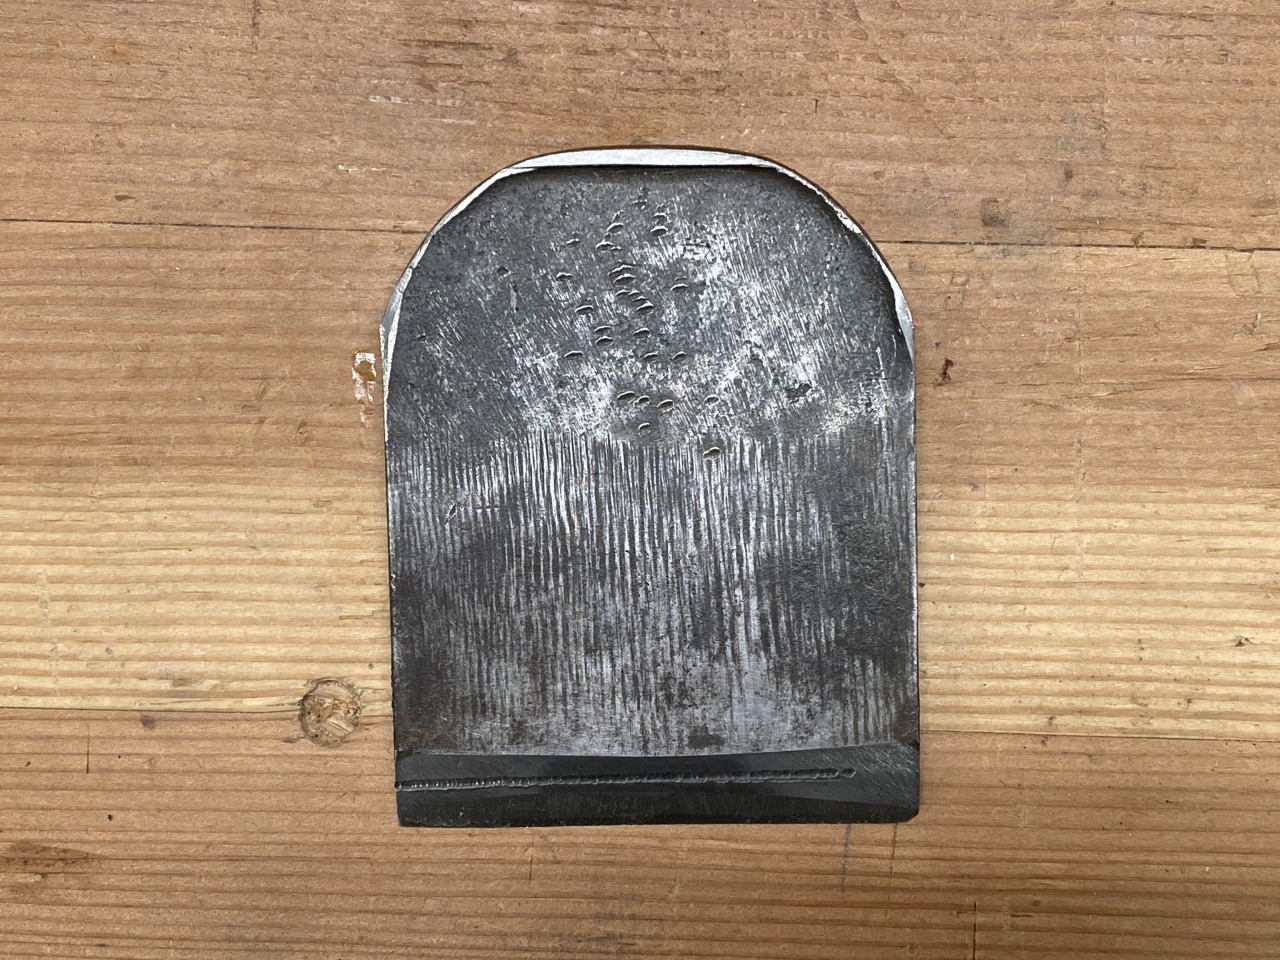
And here’s the back after using medium and fine grit natural Japanese waterstones. The scratches are nearly gone, and the overall surface is smooth.
As you can (literally) see, it’s easy to monitor your progress, and when you’re done with the current step in the sharpening process so you can move on to the next one.
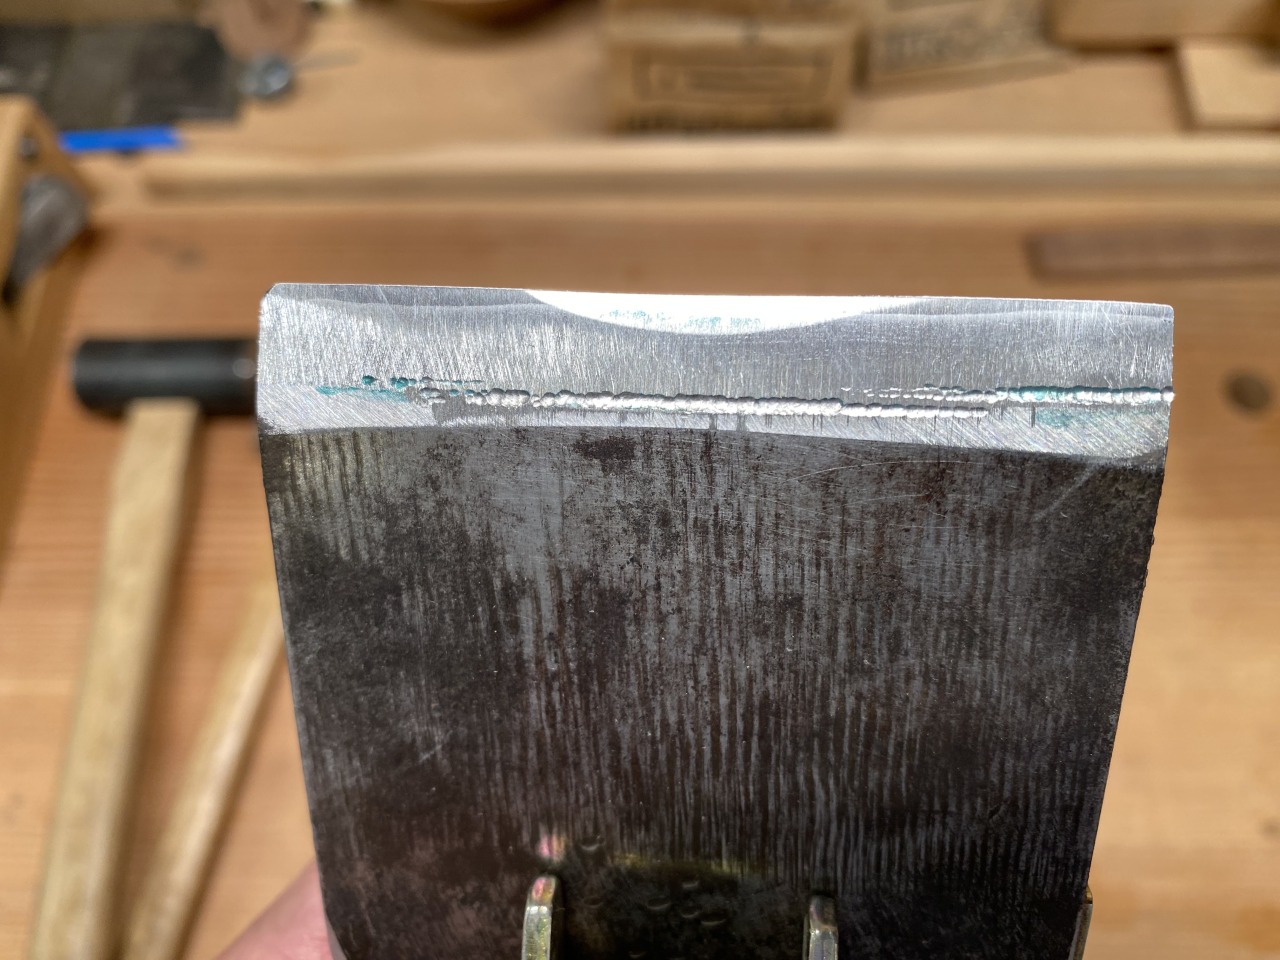
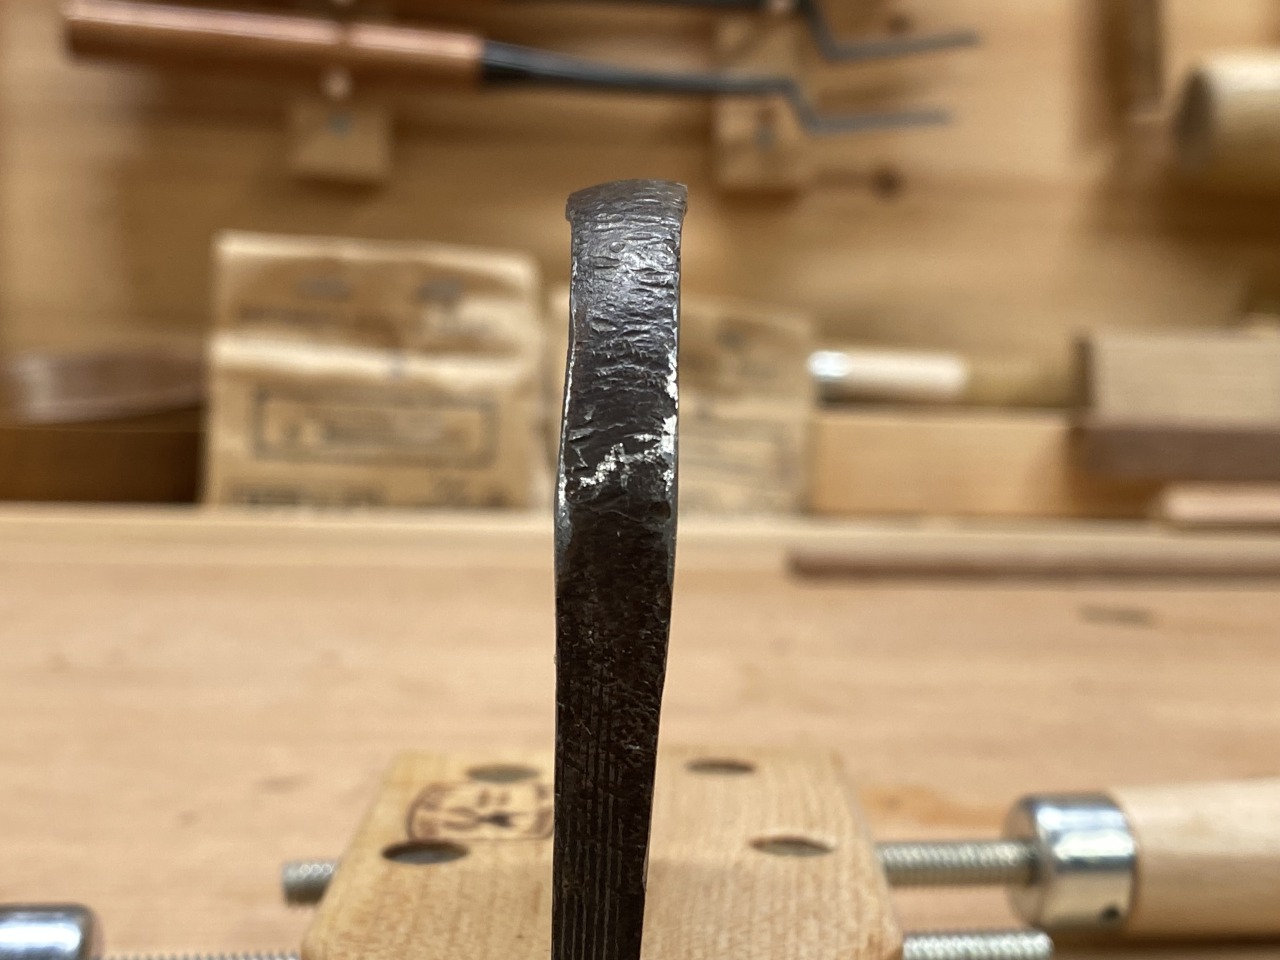
In addition to being able to see what’s going on with the surface as you go up through the grits of your sharpening routine, seeing nicks and edge damage is trivially easy. Here’s an example of small nicks in the edge of a chisel that are obvious when looking directly at the tool.
I can see these nicks using the “line of light” test without using a loupe. But when I first started figuring out what a sharp edge was, looking at the edge under magnification let me know where the line of light should be, which then taught me how to use the line of light test. And even then, it’s not any faster than using a loupe.
Again, I don’t know why anyone would disparage the idea of directly examining the edge when sharpening. It’s easy and fast, which I’m sure is what we all want our woodworking tasks to be.
There’s one other aspect of sharpening that is in play here. Besides getting the edge to a zero-radius, the surfaces that come to that zero-radius should be as smooth as possible. The good thing here is that any woodworker should be comfortable with that idea for tools, because any woodworker understands using sandpaper to smooth a wood surface by going up through the grits. The same principle applies with sharpening.
At this point, I’m going to stay away from the actual method of sharpening (waterstones, diamond plates, oilstones, Scary Sharp, etc.) because the principles are the same. So for the purposes of this discussion, I’m going to use the term “widget” for the method of sharpening.
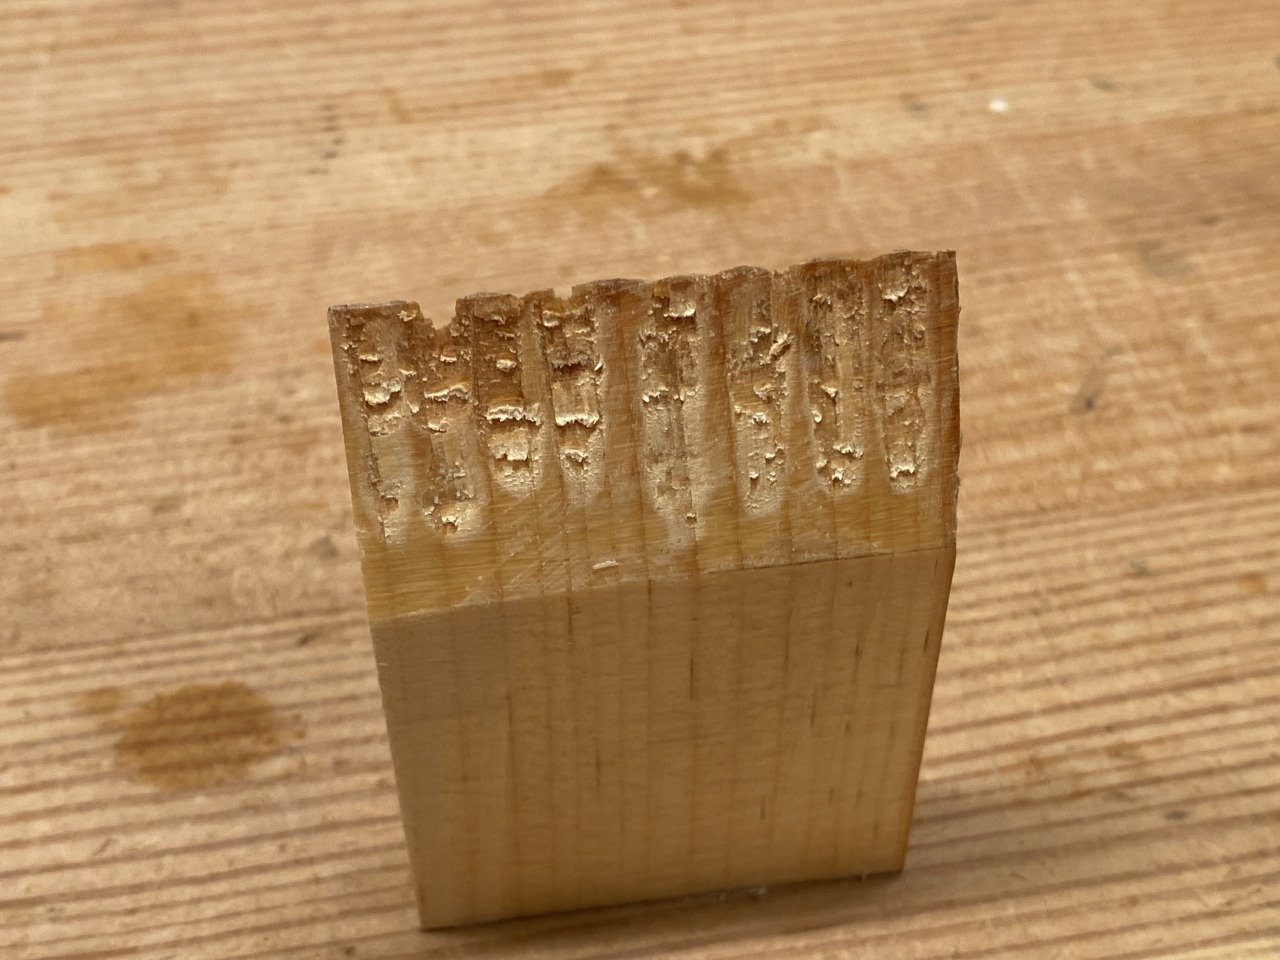
To get a better idea of what’s happening, here are some models of an edge tool that should show why getting a smooth surface is important.
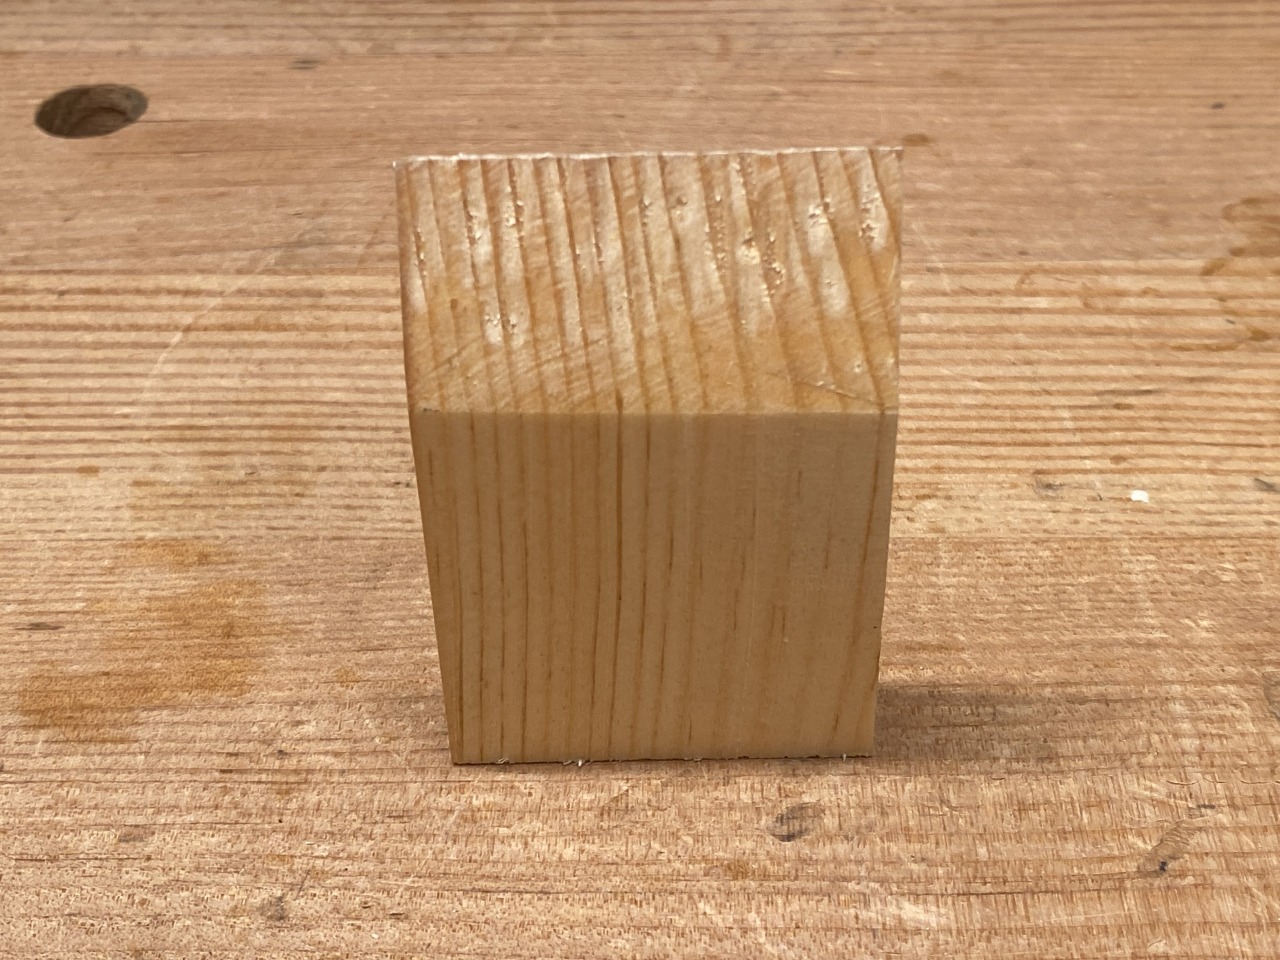
This is an edge tool that has been sharpened with a relatively coarse grit widget. The coarse grits leave large scratches in the surface of the bevel and back of the tool.
The surfaces still come to a zero-radius, but this edge is not optimal. The large scratches results in little microteeth. The fact that the scratches don’t line up results in a little wavy profile on the edge. And if one of those microteeth break off, or get rolled over, you no longer have a zero-radius edge at that spot.
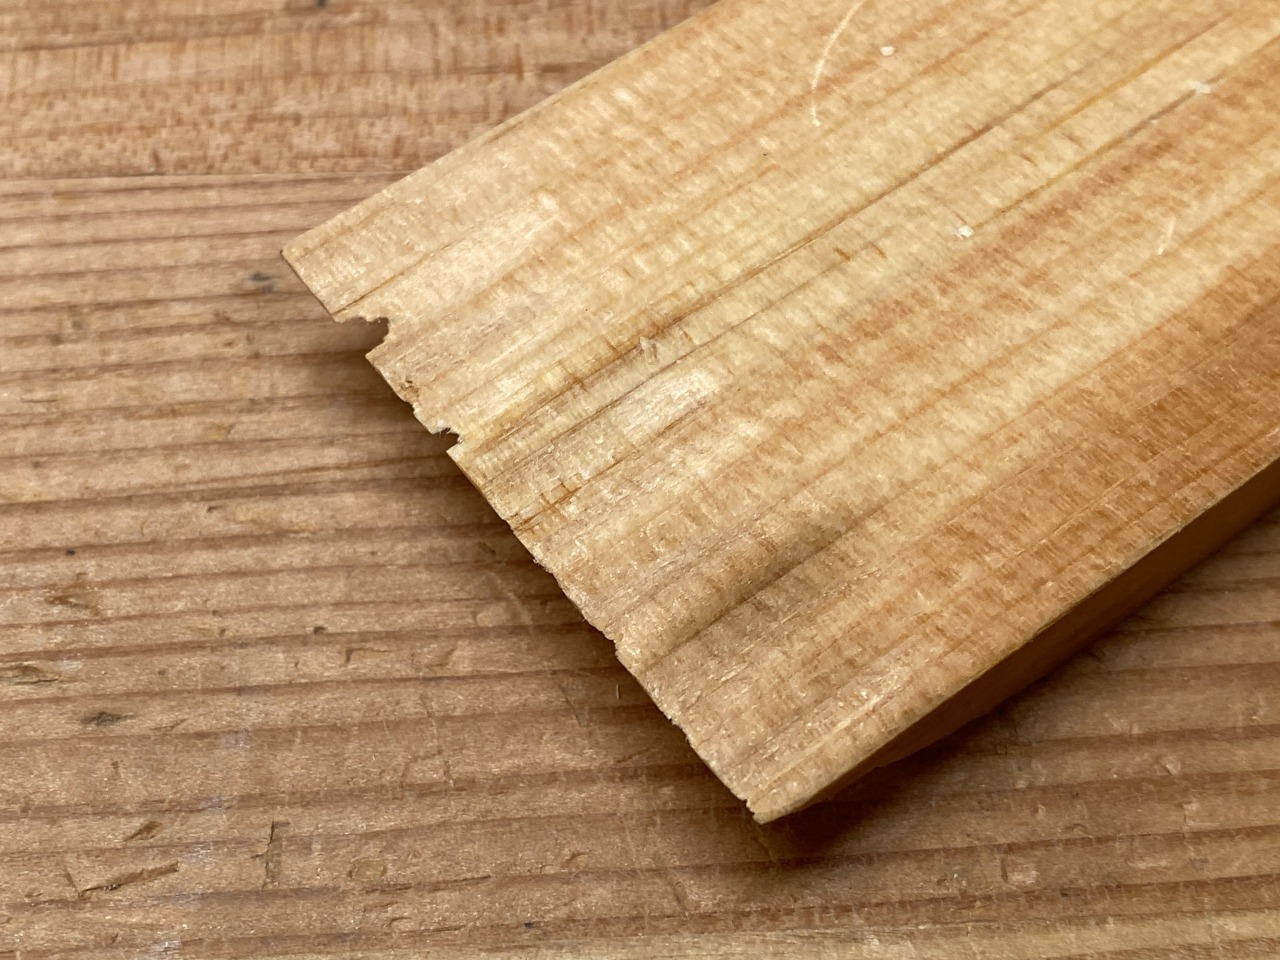
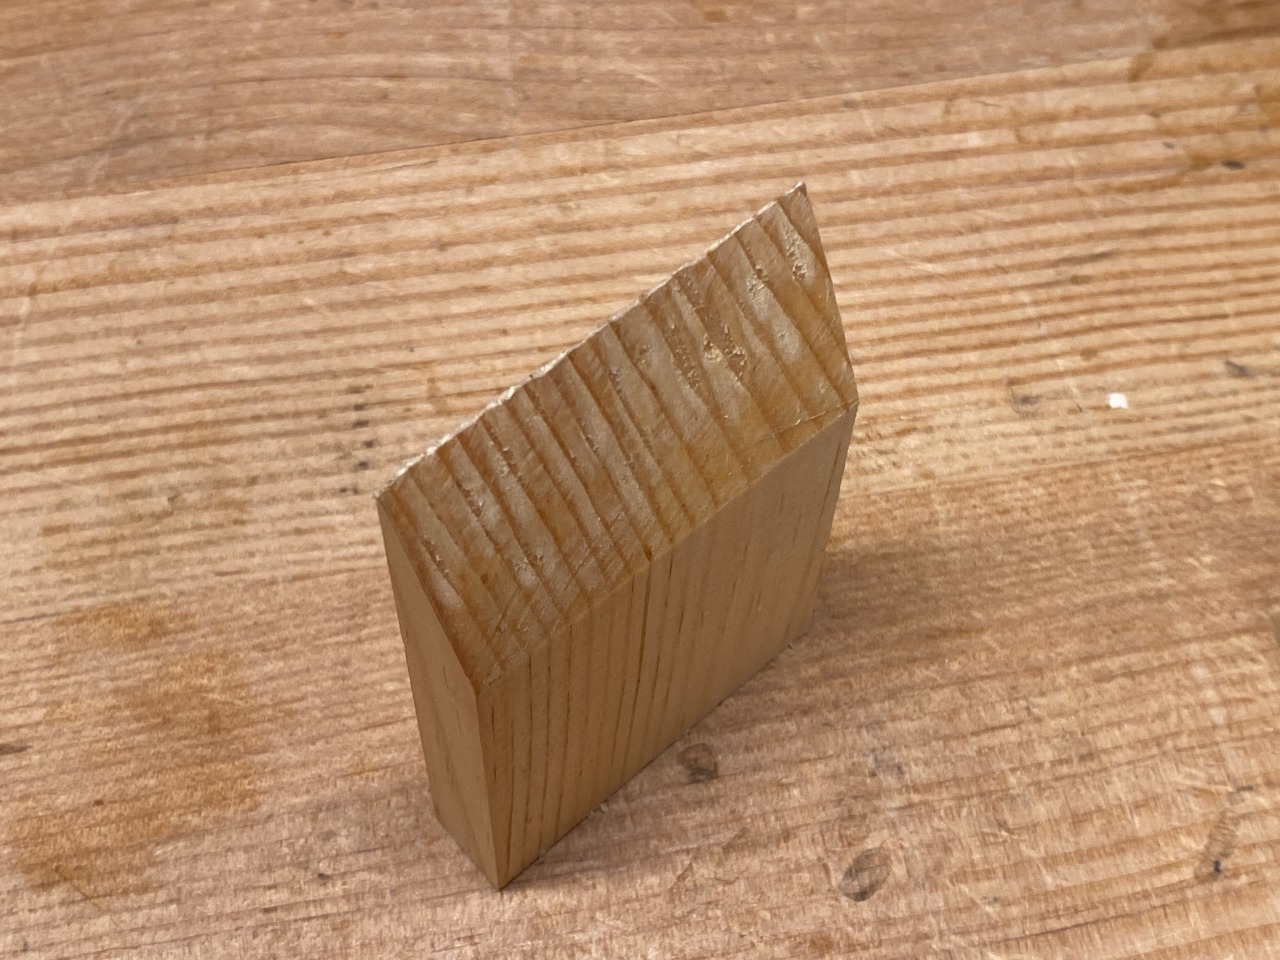
Now let’s move on to a less coarse grit widget, much like you might go from initial sanding at 80 grit to 120 grit.
The surfaces still have scratches, but the scratches are smaller. Again, there’s a zero-radius, but some waviness can be seen. The edge could still be improved. Let’s keep going.
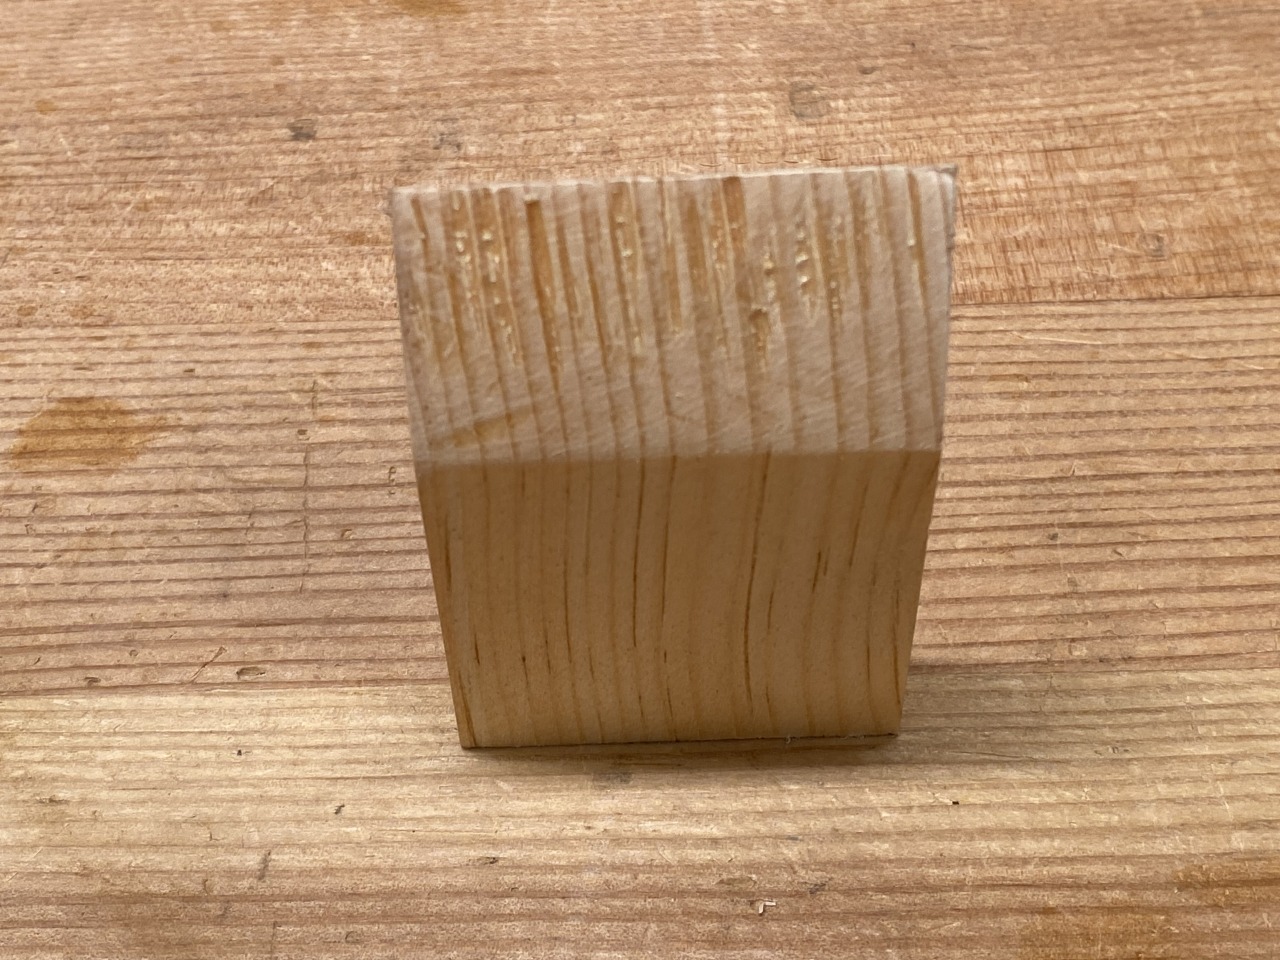
Moving to the next higher grit widget continues to improve the edge. Let’s keep going.
And here’s the Platonic ideal of a sharp edge — two smooth surfaces, coming together at a zero-radius. This is a sharp edge, making it easy to cut through wood. And this edge will last a long time, as there are no miniature peaks to fail as the tool is used.
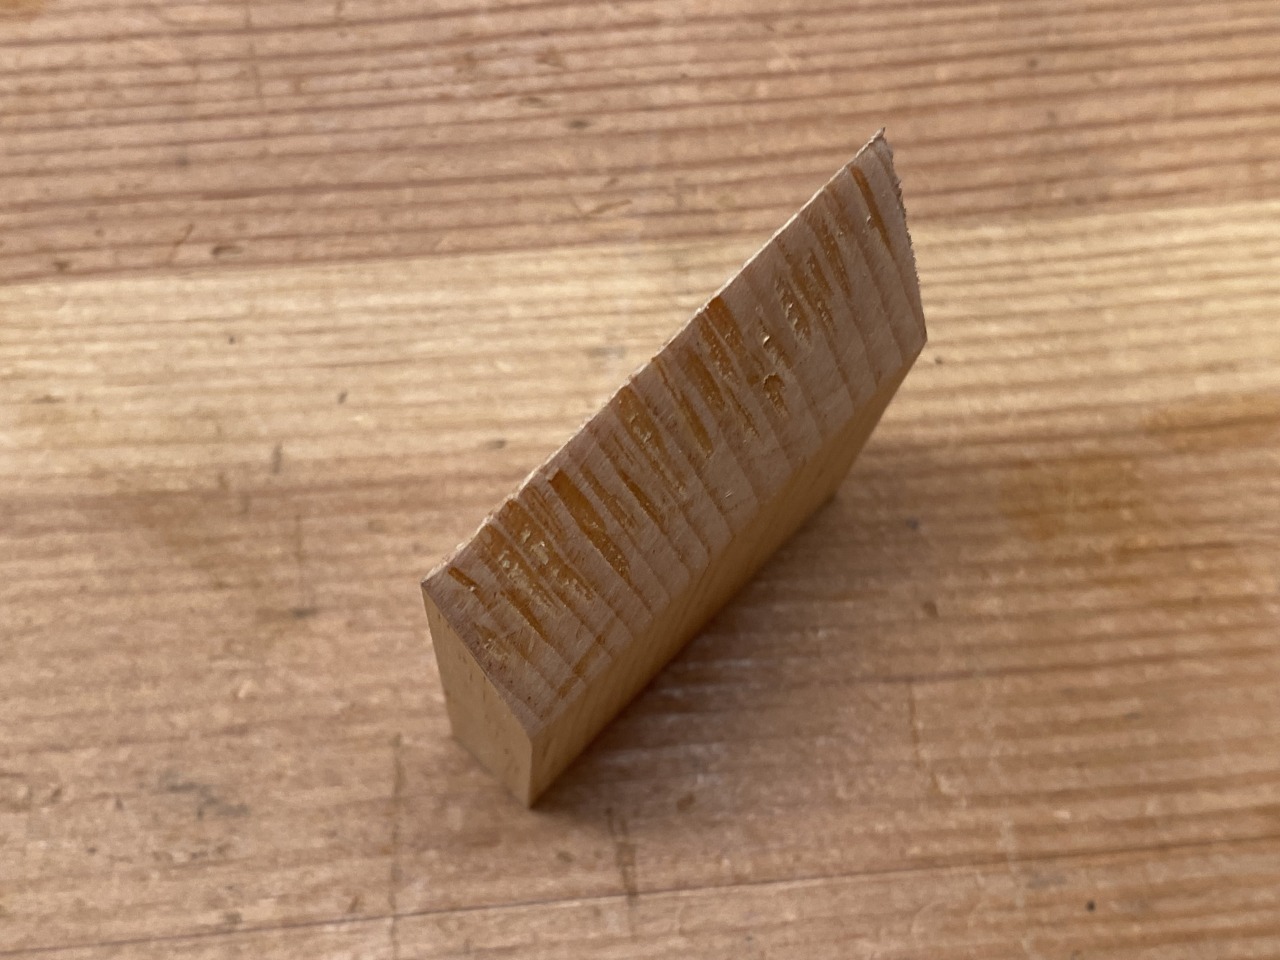
In fact, sometimes it’s said that there’s no use sharpening, say, a chisel to a very fine degree, as the first chop will destroy the edge. This model indicates otherwise — the further you go in sharpening, the more durable the edge will be. My experience tells me the same thing as well.
As we noted before, sharpening the plane blade is the first step in setting up a Japanese plane, as sharpening changes the geometry of the blade, which in turn affects the fit of the blade in the plane. Sharpening gets a bad rap among woodworkers. It’s often thought of as a task that is not a great use of time. “I want to do woodworking, not sharpening,” is a common saying adopted by woodworkers.
I think that’s a mistaken concept. Sharpening is woodworking. It makes your tool easier and safer to use. With a sharp tool, you’ll use less effort and have more control over the results you’re trying to get. By not sharpening, there’s an implicit acceptance of making your woodworking task harder to do, with less chance of success.
Besides, if it really was true that woodworkers want to avoid sharpening at all costs, we would all be using Japanese tools. The steel in Japanese tools really does sharpen to a finer degree and holds sharpness longer than western tool steels, while being no harder to sharpen than western tools. There are two reasons to prefer a western chisel over a Japanese chisel. The first is that you like the feel of a bigger chisel, as Japanese chisels tend to be smaller than their western counterparts. The second is that you want to spend more time sharpening.
The good news is, it’s simpler and easier than you think to get really sharp edges.
The hardest part about sharpening is understanding what “sharp” really means, especially if you are trying to do this outside of a real-world, live class or demonstration. The best way I can explain what “sharp” is from a distance is this:
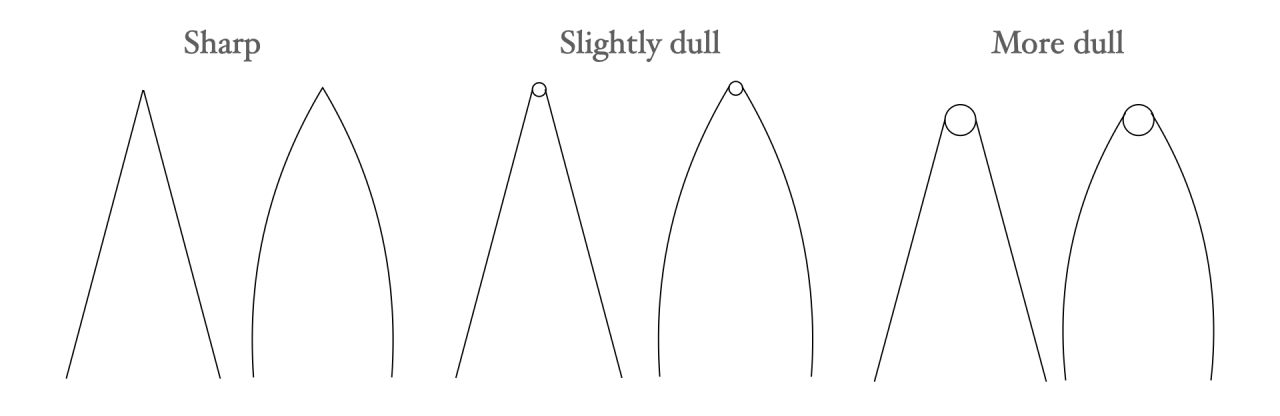
You have a sharp edge when the two sides of your plane blade/chisel have a zero-radius at the point where they meet.
Please note that I’m not talking about flat, or a mirror polish. Sharpness is often defined in these terms, but I like to avoid them because they focus on factors that are less important.
This diagram of cross sections of an edge shows why flatness isn’t the most important thing. On the left, there are two edges that are both sharp. One has two flat surfaces coming together at a point with a zero-radius. The second one is the same, but the surfaces are curved. (Think of the edge of a kitchen knife or an ax.) Both edges are going to be sharp.
The middle part of the diagram shows the same cross sections, but with a bit of a round-over with a small radius where the edges meet. This is an edge that is starting to get dull. This happens both with the flat and curved sides. The small amount of dulling has nothing to do with how flat or curved the sides might be, just what is happening at the edge.
The right part of the diagram shows the same cross sections, but with a greater round-over with a larger radius. Again, the flatness of the sides don’t have much to do with what is going on at the edge.
There are a number of tried and true methods of assessing the edge, and if you keep the idea of a zero-radius point, they will all make sense. One method of assessing sharpness as you sharpen a tool is getting a burr to form. The burr only forms once you’ve abraded enough material to eliminate the roundness from the edge of the tool. If there’s some roundness left at the edge, the metal will continue to come off without forming a burr.
Another method is to move the tool under a light while looking down at the edge of the tool, and to look for a line of light at the edge. If you see a line of light, then you need to keep sharpening. The reason the line of light appears is that if the edge still has some roundness to it, at some point the roundness will reflect light from the light source, which creates the “line of light” effect. If the two surfaces meet at a zero-radius, there’s no roundness to reflect light.
There’s also the fingernail test. A sharp edge will catch on your fingernail. (If you use this test, please be careful.) If the edge has some roundness, the edge will skate along your fingernail. But if the edge comes to a zero-radius point, it will catch.
This is not to say that flatness and a mirror polish aren’t useful in the sharpening process. It’s just that they aren’t the most important things. They both have a role to play in sharpening. We’ll get to how and why soon.
Any weirdness you’ve been seeing on the desktop version of Giant Cypress is me mucking around with a new theme. With the old theme, new posts have sometimes been displaying in unexpected ways, because of the new post format that Tumblr implemented. In addition, the old theme had become less well-behaved on mobile devices. So I thought it was time to redesign the blog.
The new theme has all the components that the old one did. I’ve carried over many of the design elements of the old theme, which I think is nice. It’s more responsive, with an improved look on a wider array of different screen sizes, on mobile and desktop. I think it scans better now, as well as having a better balance between text and photos for posts. And then there were the many tiny tweaks that may or may not have been that noticeable, but were driving me nuts. That’s why I spent a good 30 minutes this morning chasing down why a dot was positioning itself a hair to the right from where I was expecting it.
Anyway, I think I’m done, and I hope you like the new theme. If there’s anything that seems off, please let me know.
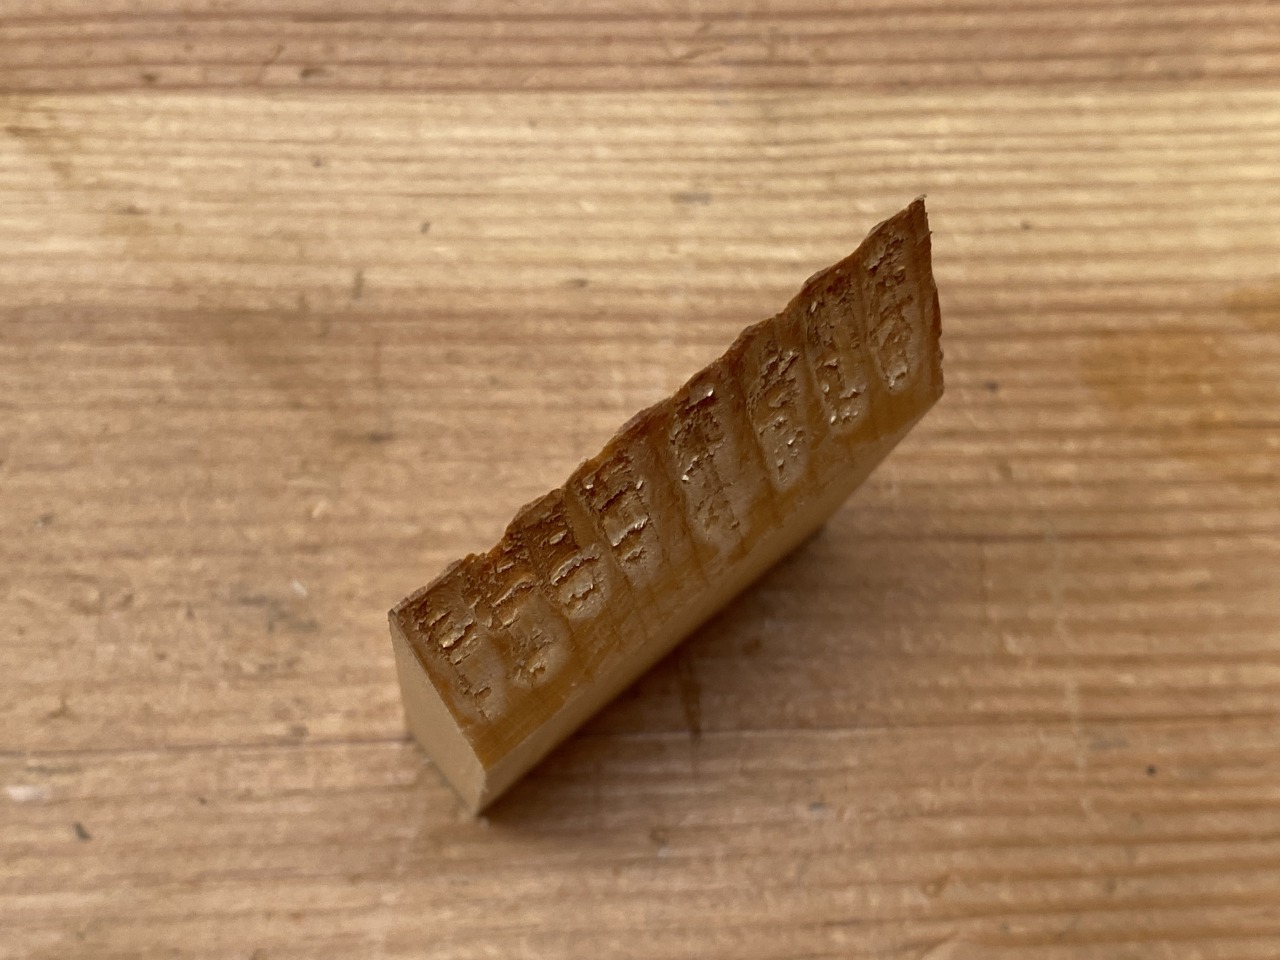
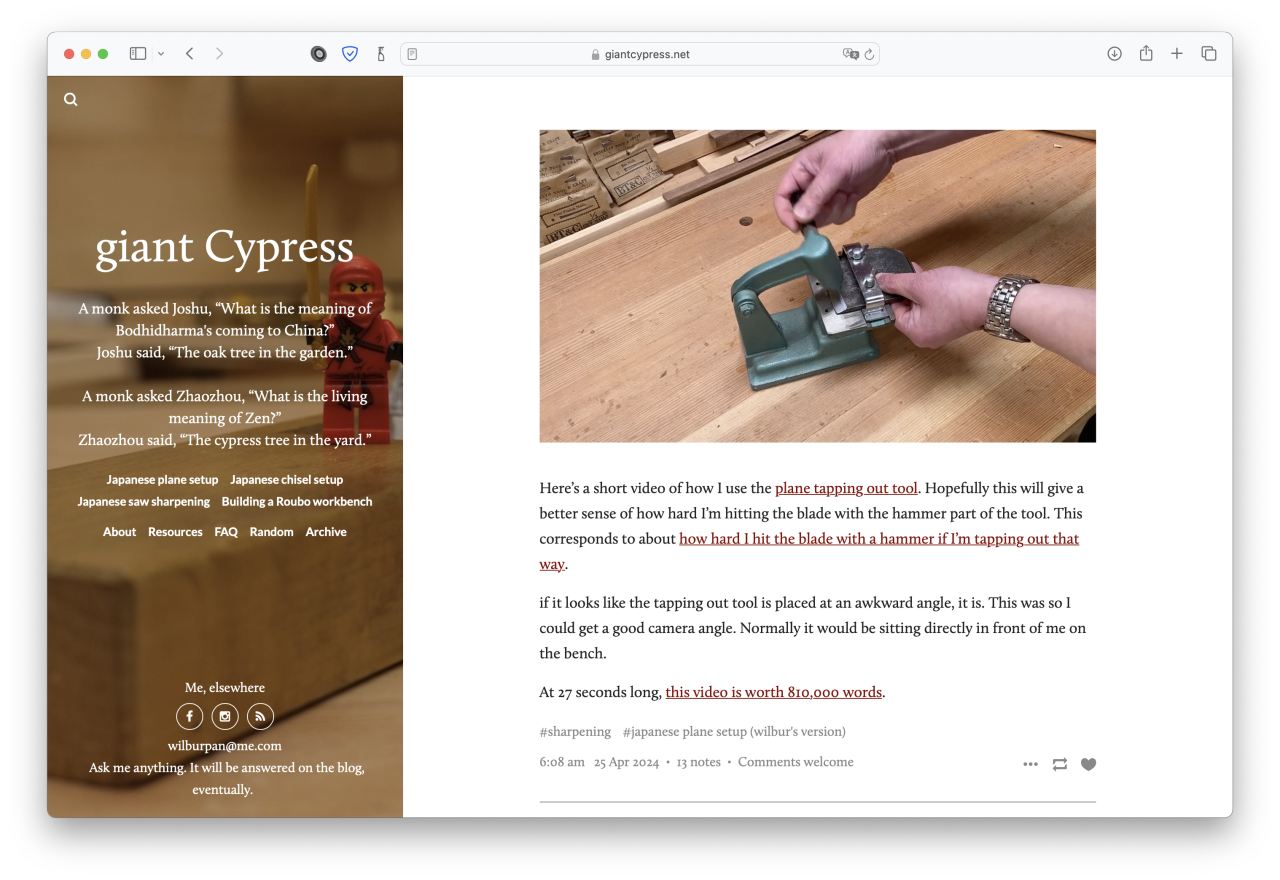
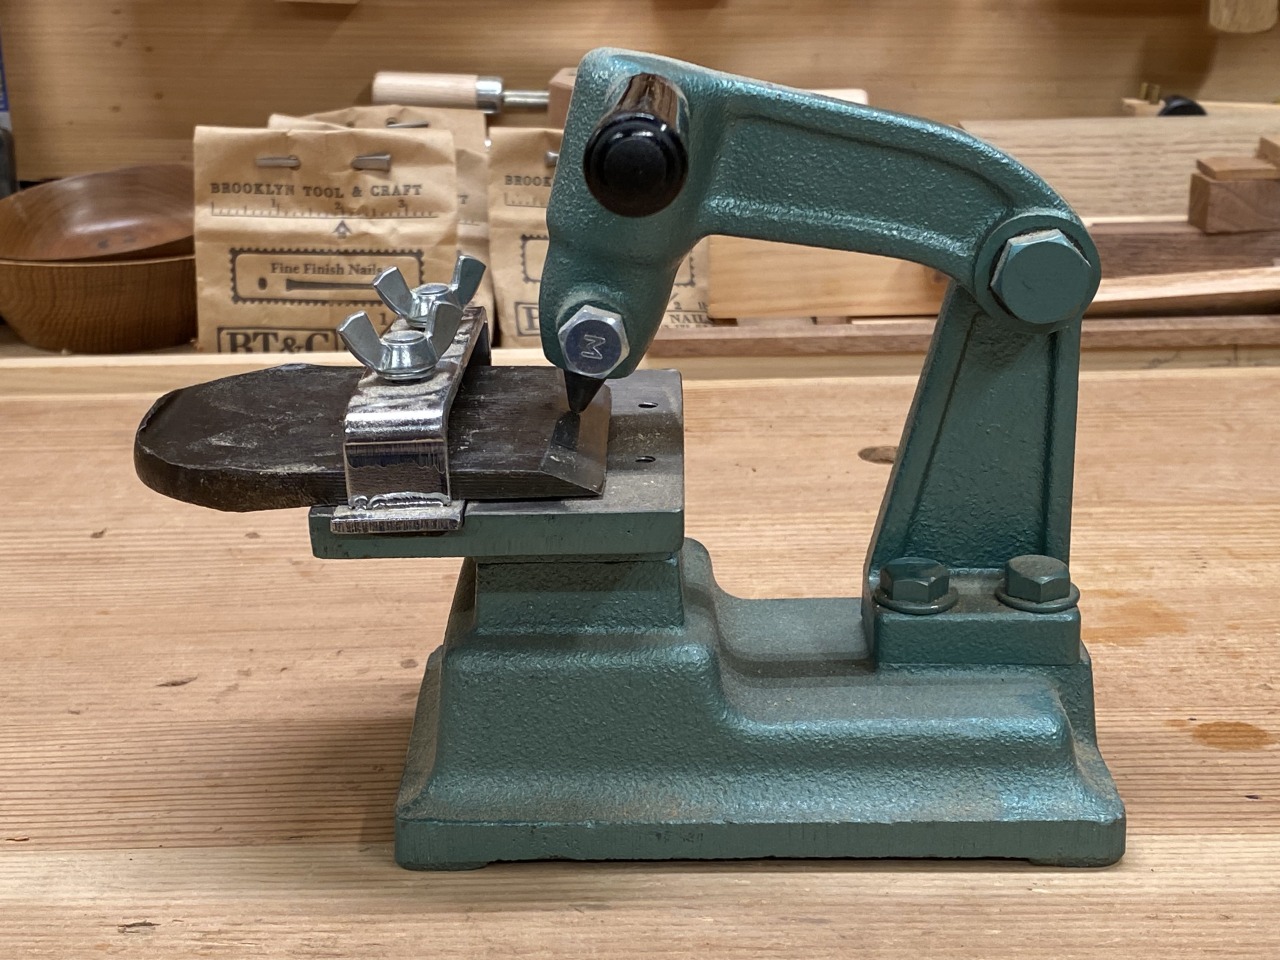
if it looks like the tapping out tool is placed at an awkward angle, it is. This was so I could get a good camera angle. Normally it would be sitting directly in front of me on the bench.
[Note: this step should not be needed with a new Japanese plane, but you never know. And It is an important part of sharpening and maintenance as you use your plane.]
Now that the plane blade is in better shape, we can turn to sharpening. The first thing to check with sharpening a Japanese plane blade is the hollow on the back. The back of the blade is where the hard steel layer is. When sharpening, if we were to work the entire back, that would be a real chore because of the hardness of the steel. The hollow is there to make this much easier, as only the flat part behind the cutting edge needs to be dealt with.
Tapping out causes much angst among woodworkers looking to use Japanese planes. I think that’s partially because that the traditional method of tapping out using a hammer and an anvil or some other supporting surface has the chance of disaster if the hammer blow hits too close to the edge. In my experience, that’s a bit overblown. If you have the hand-eye coordination to do woodworking, you’ll be able to do this task.
The other issue is that the physical act of tapping out is hard to convey in words, especially regarding how hard to tap the blade with the hammer. I’ll do my best.
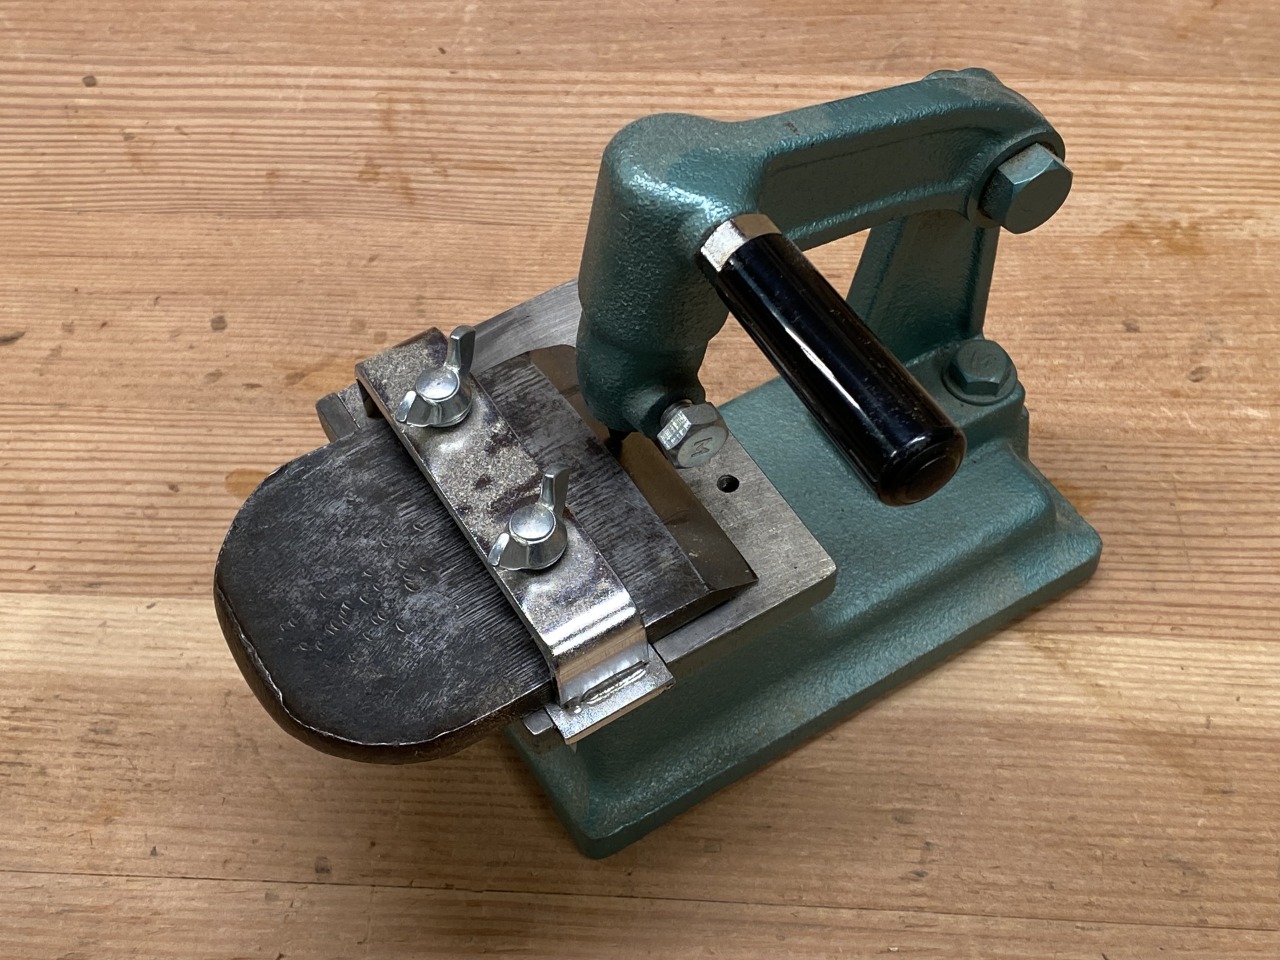
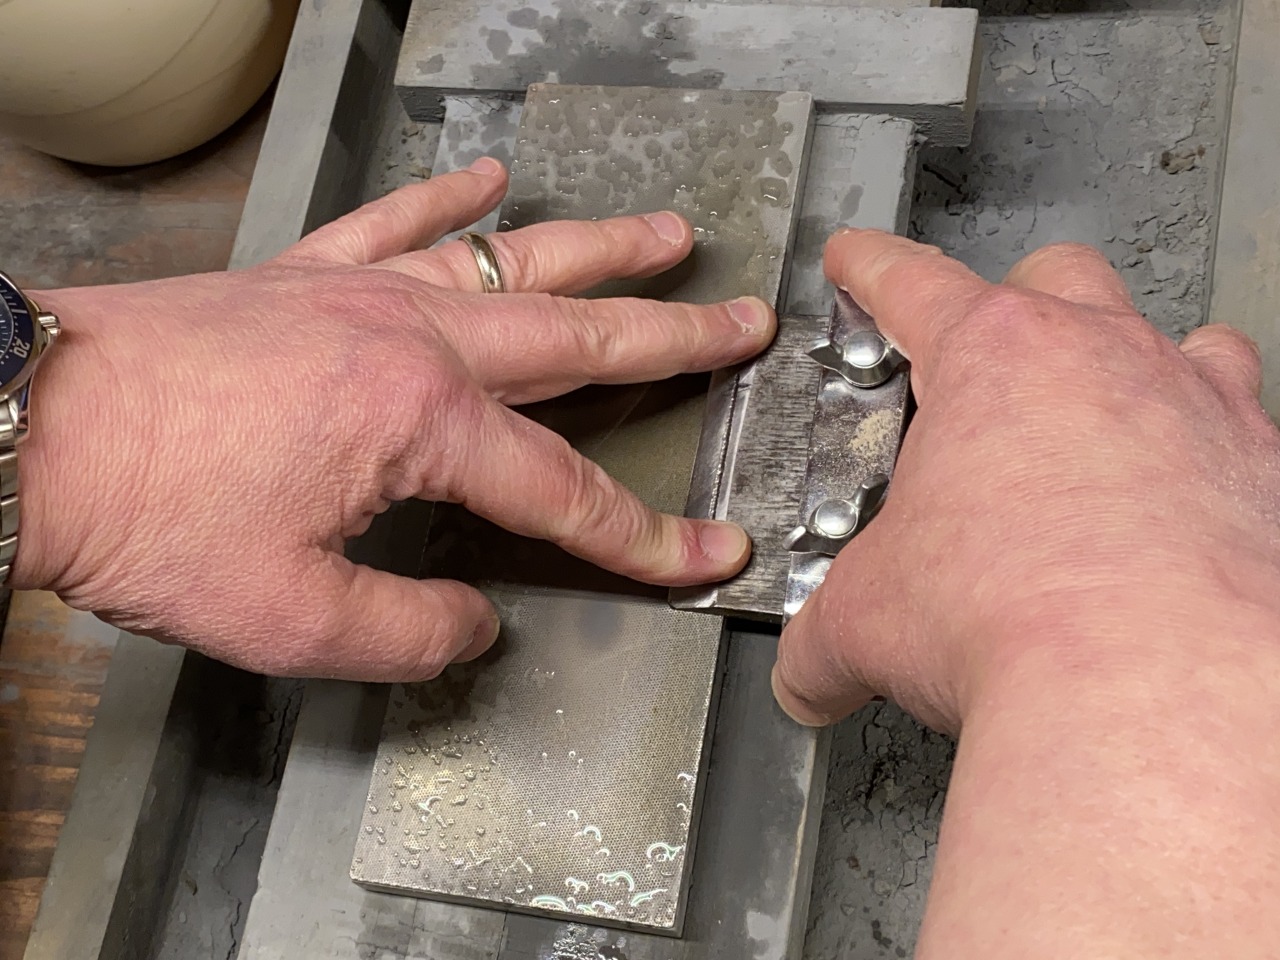
I’ve written elsewhere about using a hammer and an auto body float as an anvil for tapping out, and that system still works well. Since then, I found a device that makes tapping out a bit easier for people who don’t do it all the time. And to be honest, it’s easier for me, too. Here it is.
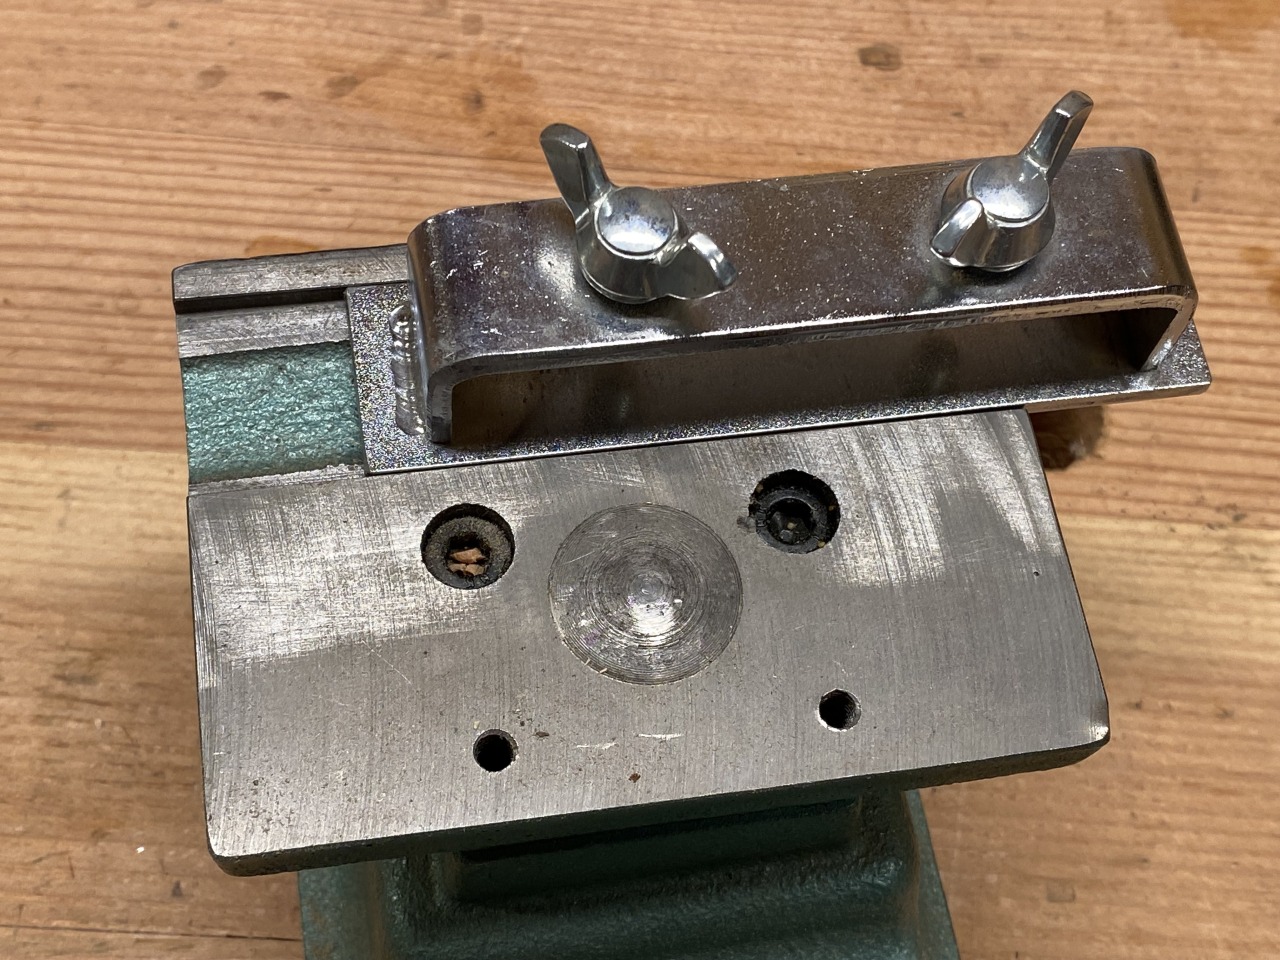
This device has a hammer head that comes to a point, mounted on a hinge. The blade is held in a carrier by two bolts.
The blade is positioned over a small rounded surface that serves as the anvil. This is located under where the point of the hammer will come down. The carrier slides in a track that allows you to move the blade back and forth.
By fixing the blade in the carrier, it can be positioned so that the hammer comes down in exactly the spot you want it to of the tapping out process. To get started, I put some pencil lines on the bevel side that corresponds to the flat area on the back that needs to be reestablished.
Then I can use the device to start tapping. The point of the hammer is positioned about 2/3 to ¾ of the way up from the edge. I’ll start tapping with the hammer while sliding the plane blade back and forth, concentrating on the area that I marked with the pencil lines.
It’s hard to quantify how hard I’m hitting the blade with the hammer, but it’s probably in the ballpark of how I would be hammering a finish nail into a piece of pine. You will leave little dents in the soft layer of steel.
After some tapping, the bottom hard steel layer will be pushed down. You can see this by working the back of the blade after tapping. The flat area behind the cutting edge gets reestablished pretty quickly.
More interestingly, you can see the deformation of the blade from tapping out by working the bevel side of the blade with a coarse stone. The shallow hollow in the middle was created by the tapping out process.
And after more sharpening, that hollow goes away.
Is this device necessary for tapping out? No, but it sure makes it a lot easier. And given how simple the device is, it might not be too hard to rig up something like this on your own.
[Note: this step should not be needed with a new Japanese plane.]
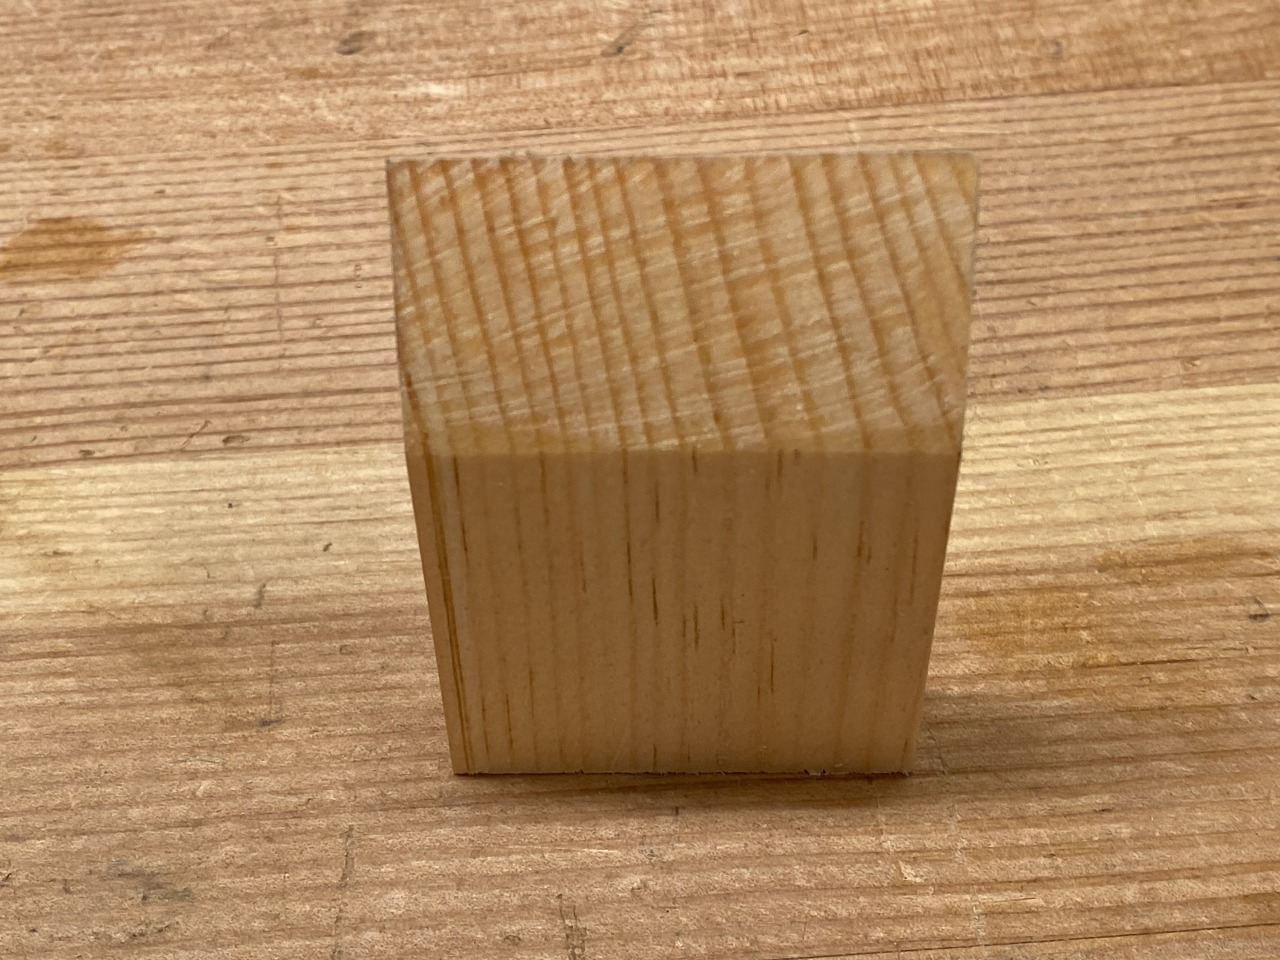
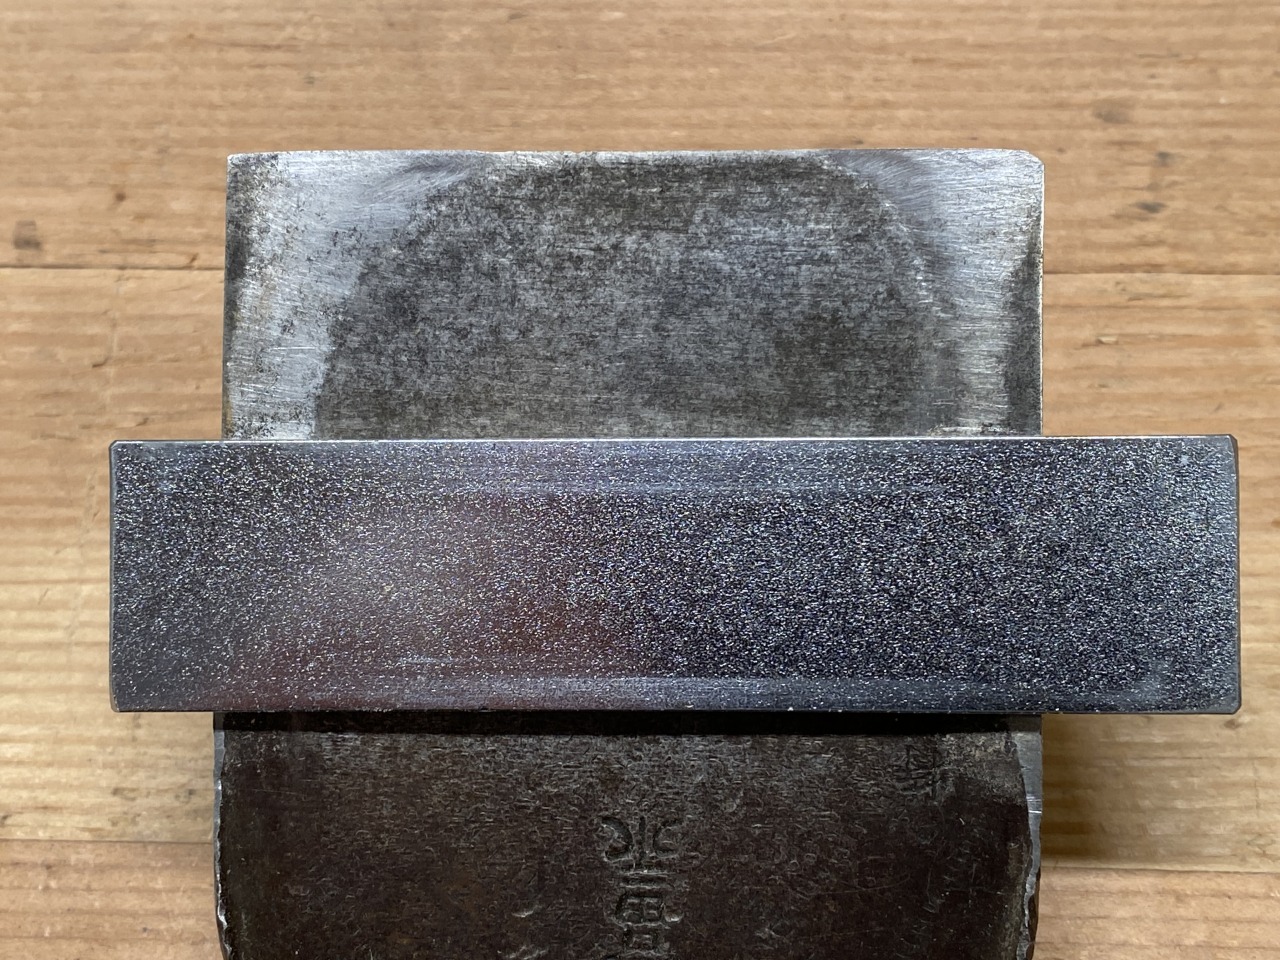
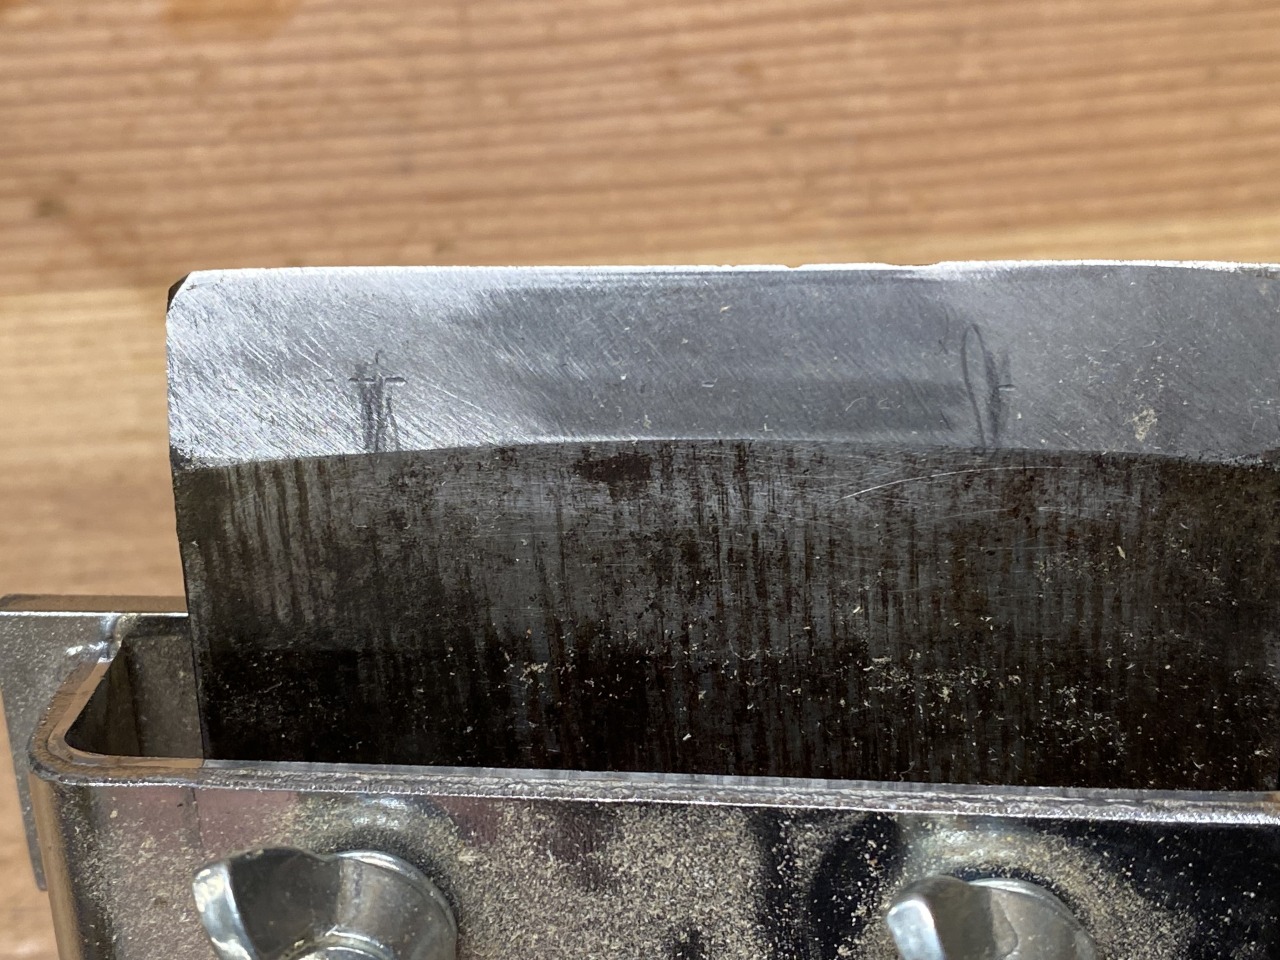
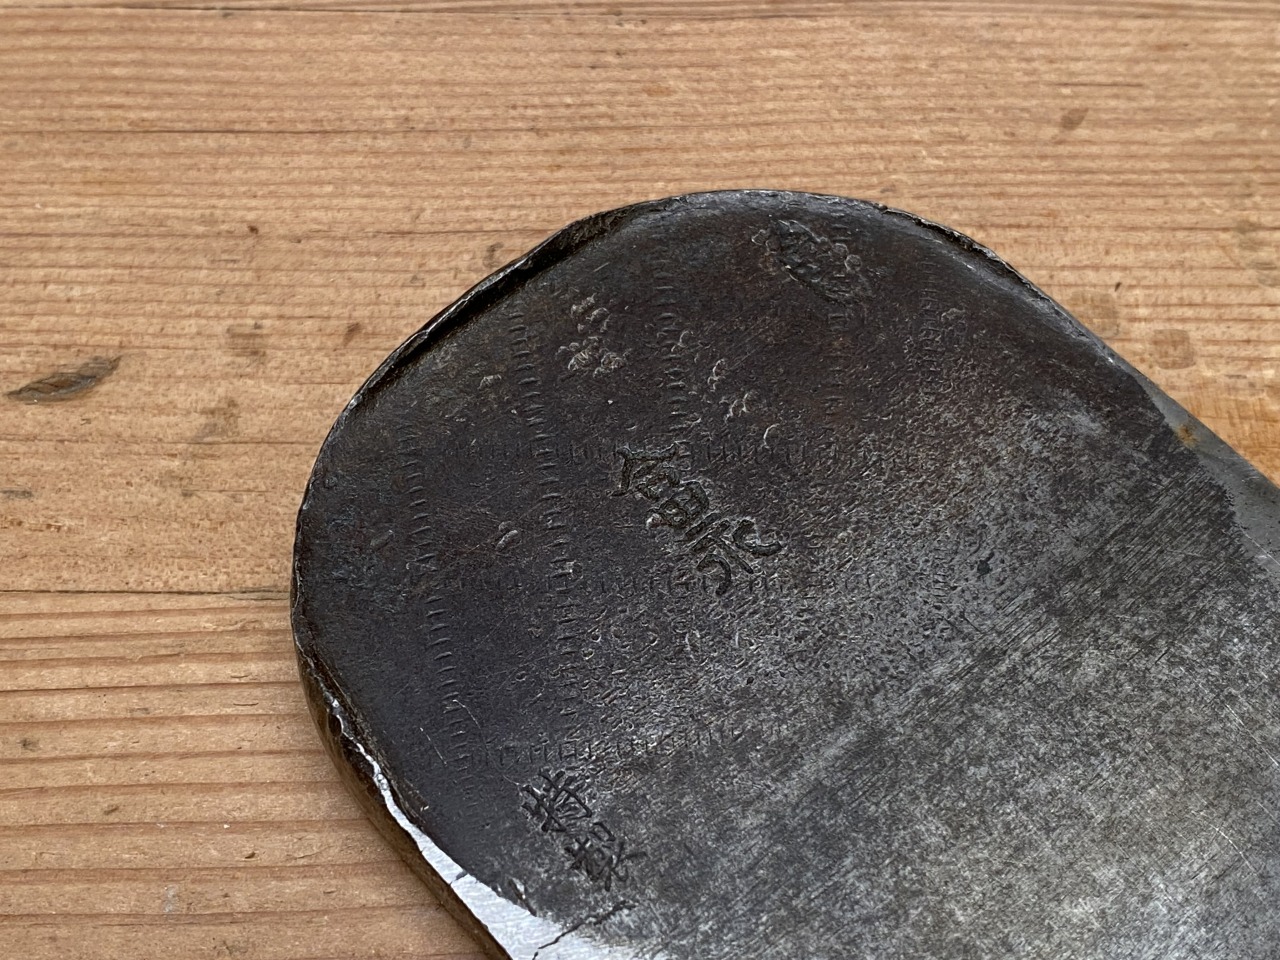
This being a used Japanese plane, the blade isn’t perfect. It’s got a fair amount of mushrooming around the top of the plane blade.
The mushrooming is in three spots — at the top, and on the sides. This speaks to how consistent the previous owner of the plane must have been when tapping the blade to adjust its position. It also makes me think that the previous owner might have used a 1500g hammer for the adjusting.
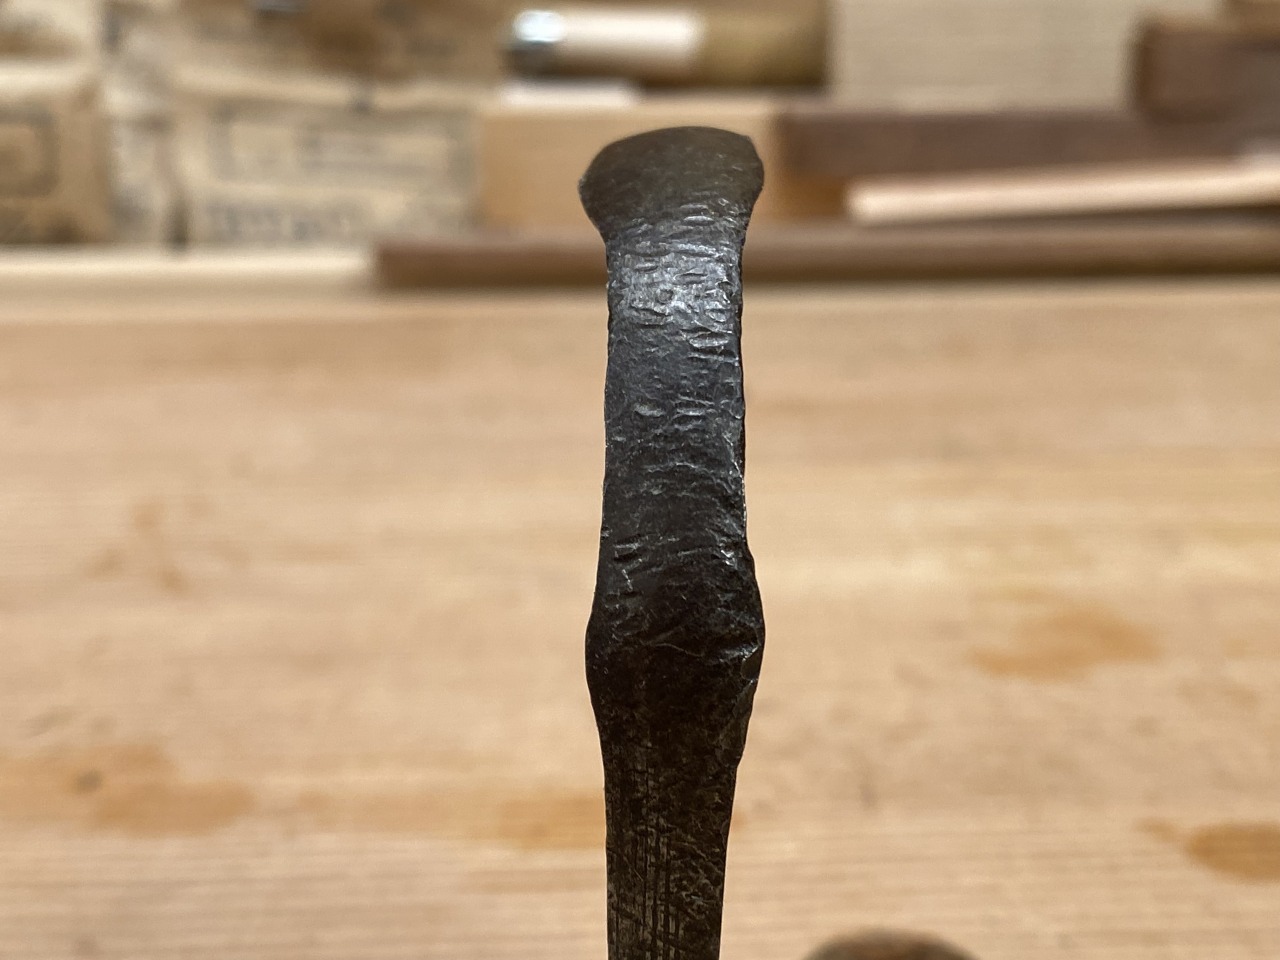
I could just leave the mushrooming alone, but to my eyes, it doesn’t look great. From a more practical standpoint, I want to adjust the bevel angle when sharpening, which means that I’ll want to use my Grintec sharpening jig, and the mushrooming prevents the blade from fitting into the jig.
The approach to fixing the mushrooming wasn’t too sophisticated. I used a combination of hammering the mushroomed areas on a small anvil, grinding down the mushrooming, and a file. Here’s the end result.
It’s not perfect, but it’s better than it was before. More importantly, the blade will now fit into my Grintec sharpening jig.