Japanese plane set up - II: Sole conditioning
After the blade has been fitted, the next thing to do is to condition the sole. I’ve used this schematic before, but this is the strategy for the setup of the sole for most Japanese planes. The only parts of the sole that touch the wood are a narrow area at the front of the plane and a narrow strip immediately in front of the mouth of the plane.
Getting to such a configuration is easier than one might expect. The first step is to ensure that the sole of the plane is flat and free of twist. Winding sticks are a great way to determine if the body of the plane has any twist, but they should be placed at the front of the plane and immediately in front of the mouth. If there is any twist, use your favorite method of flattening a board to eliminate it. The sole of the plane can be planed flat, of course, but alternate methods include using a scraper to selectively bring down the high spots, or using a piece of sandpaper on a flat reference surface, like a granite plate or a piece of glass.
The last method has the disadvantage of the possibility of embedding a piece of abrasive in the sole, but I’ve found that as long as a high enough grit of sandpaper is used, that issue seems to be more in the realm of theory. I’ve used 400 grit sandpaper for this step in the past, but for planes that I intend to use for really fine smoothing work, I’ll use a scraper, just in case.
Regardless of the method used, it’s important not to get too aggressive about flattening the bottom of the plane, due to the possibility of opening up the mouth if too much wood is removed, or bringing the sole out of square with the sides of the plane. Luckily, I really didn’t have to do too much to this plane to flatten the sole.
The next step is to mark the areas to scrape away. It’s pretty easy to use a square to mark lines at the front of the plane and in front of the mouth to delineate the areas to leave alone. The red shaded areas indicate the areas of the sole of the plane that need to be removed. I had initially marked those areas with pencil, but it didn’t photograph well. The pencil marks do help me keep track of where I’ve already scraped the sole of the plane.
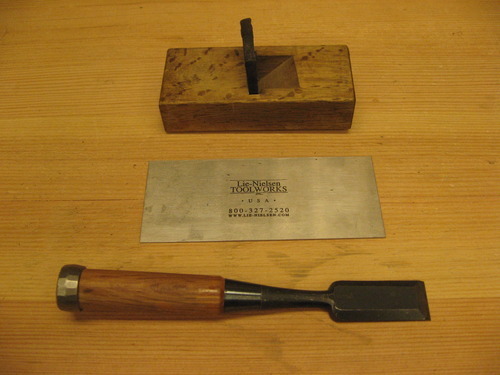
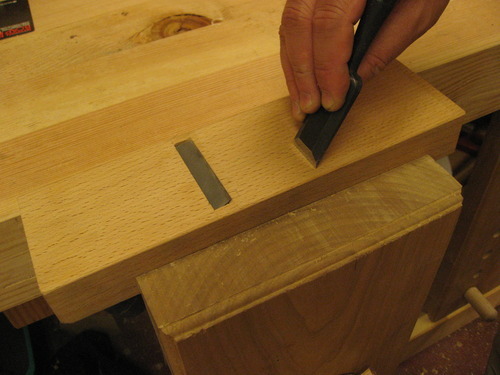
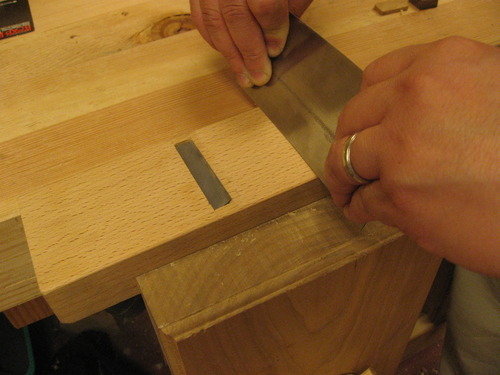
Again, there are a variety of ways to scrape the sole. The traditional way is to use a Japanese sole conditioning plane, seen at top. This plane works almost identically to a scraper plane. My favorite method is to use a card scraper. A wide chisel can also be used.
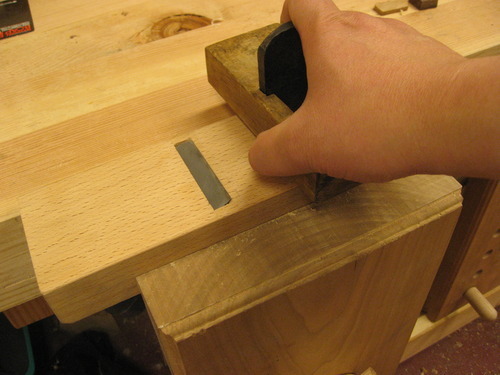
The sole conditioning plane is used across the grain, as seen above. If I use a chisel or a card scraper, I tend to go along the grain, as seen below. This may or may not be traditional practice (definitely not in the case of a card scraper), but both methods also work well.
It’s also important to make sure that the entire area of the sole behind the mouth is relieved by a small bit. The easiest part to miss is the area immediately behind the mouth, especially since that area often bulges down a little bit as the blade is tapped in. Unfortunately, this is the area that will cause the most problems if it’s not completely relieved, just like a western plane.
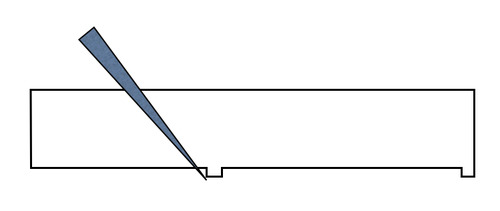
Although this may seem like an awful lot of work, this goes much more quickly than one might expect. It took less than 10 minutes to scrape down the penciled in areas of the plane. There doesn’t need to be a huge amount of relief — 1/64" is more than enough. To check if the scraping process is complete, tap the blade into position, and place a straightedge with a notch to accommodate the blade edge across the sole, and hold the plane and straightedge up to a light. A thin line of light should be seen between the untouched areas of the sole at the front of the plane and in front of the mouth, and another line of light should be seen across the entire rear of the plane behind the mouth. If there is an area of contact, scrape that area some more.
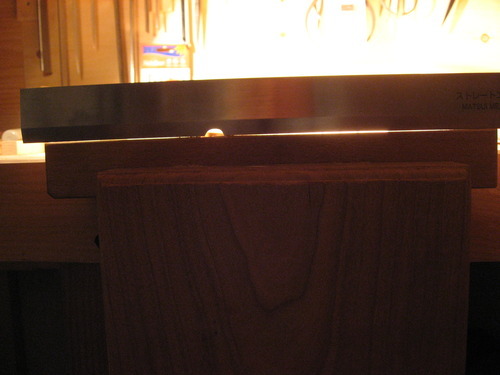
This was hard to photograph, but the above picture should give an idea of what to expect. The straightedge makes contact with the front of the sole on the left, and immediately in front of the mouth on the right hand side of the semicircular notch. It looks like the straightedge touches the sole immediately behind the mouth to the left of the semicircular notch, but there really is a gap there. I think some dust got in the way.
Believe it or not, between fitting the blade and conditioning the sole, I’m almost completely done setting up this plane. There are just a few details left to go.