Hacking the OS X Boot Image on an Intel Mac
I’d really like to use a Mac Mini for my MAME arcade cabinet. I’m currently running Windows 98 on an old beige box PC, and I really want to switch to more modern hardware and software. The Mac Mini is the smallest and quietest machine out there. The wireless ethernet, keyboard, and mouse make it a perfect fit. I could even run Windows XP on it, since most emulators are designed primarily for Windows. But it would be nice to use OS X, if for no other reason than to save the $200 XP license.
Since Mac OS X would be acting like an embedded operating system inside the arcade, I want to conceal the fact that it is a generic computer running a standard OS. This means, hiding as much of OS X as possible. Technote TN2602 covers how to hide things like the menu bar and Dock, and even how to replace the Finder as the main application. However, I want to cover all the details, including images displayed at boot time. Res Excellence has a wealth of information on how to customize your Mac, including replacing the boot image and boot panel. However, the boot images only work on PowerPC Macs. So I decided to figure out how to do the same for Intel Macs. It turns out that Intel Macs are far more restrictive of the image than PowerPC Macs, but I was able to do it. I’m going to walk through how I reverse engineered the Intel boot loader and replaced the the standard gray Apple with the Chalice from the Atari 2600 Adventure game.


Before diving into the Intel side, I felt it was important to understand how the PowerPC hacks worked. The Mac boot sequence is covered in detail by Amit Singh. The relevant part is the fact the boot loader, BootX, draws the Apple logo. Fortunately, BootX is Open Source, so you can see how it displays the image. The logo is a 128x128 image with a color palette. The pixel data is defined, pixel by pixel, in appleboot.h. The palette is defined in clut.h (which I assume stands for “color lookup table”).
I wanted to make sure this was indeed the familiar boot image, so with a short C program, I dumped the pixel data to a file named appleboot.raw and the palette to a file named clut.act. Using some ImageMagick foo, I created a PNG from this raw data, and viewed it:
% cat clut.act appleboot.raw > appleboot.map
% convert -depth 8 -size 128x128 appleboot.map appleboot.png
% open appleboot.png
Sure enough, appleboot.png is the image we all know and love. It is now pretty clear that you can replace the logo with any 128x128 image you want by changing the pixel data and palette and recompiling BootX. But recompiling isn’t very convenient to test out a new image, and you’d have to write a tool to convert raw image data into C arrays.
Fortunately, Res Excellence has a nice tutorial on how to patch the BootX binary that shipped with your system. It requires using a hex editor and Photoshop, and is not for the faint of heart. Even better, there are tools, such as Imagine BootX that completely automate the process. However there are no tools for Intel users, so it’s important to read and understand this tutorial. The Intel procedure is based on it. You’ll notice the palette and pixel data extracted from the hex editor are exactly the same as the ones I extracted from the source code.
The boot sequence for an Intel Mac is similar to PPC Macs. However, instead of Open Firmware, the Extensible Firmware Interface (EFI) is used. Thus the BootX boot loader is replaced with an EFI boot loader called, aptly, boot.efi, and is still stored in /System/Library/CoreServices. Unfortunately, boot.efi is not Open Source like BootX. Without the source, I wasn’t even sure that boot.efi displayed with boot logo. So the first task was to verify that the standard Apple boot logo was somewhere inside of boot.efi.
Time to break out a hex editor. With nowhere else to start, I assumed the Intel image was exactly the same as the PPC one. There are two main colors in the image: the light gray background, #BFBFBF and the dark gray foreground, #737373. The palette indexes are 0x01 and 0x50, respectively. Using a hex editor, searching for the two 3-byte color sequences turned up 1 match each. Looks like I hit jackpot on the palette. The bytes from 0x010E40 to 0x01113F (in the 10.4.6 boot.efi) match our PPC palette exactly.
However, searching for a long string of 0x50 bytes (dark gray) turned up empty. So either the image is different, with the same palette, or the image was encoded somehow. After browsing the rest of the file, there didn’t seem to by any long stretches of the same two values (like 0x01 and 0x50 in the original image), so I guessed that the image was encoded. Was it possible to figure out how it was encoded without having source code? I like a challenge, so I pressed on.
My next assumption was that the image data was near the palette data, probably directly after it. EFI has some built-in compression routines, for just this kind of purpose. I figured this would be a good place to start. After reading the EFI documentation, though, I didn’t see any data after the palette that matched the compression header. So I gave up on that. However, looking at the data just after the palette (0x011140) did have some interesting properties:
FF 01 FF 01 FF 01 50 01 01 02 01 17 01 34 01 47
03 50 01 13 76 01 01 03 01 20 01 40 06 50 01 13
75 01 01 1A 01 42 07 50 01 FA 01 0A 73 01 01 07
01 34 09 50 01 43 01 02 72 01 01 0E 01 43 0A 50
01 36 72 01 01 14 01 4A 0B 50 01 20 71 01 01 12
01 4B 0B 50 01 4D 01 0B 70 01 01 0B 01 48 0C 50
While there are no long strings of 0x01 and 0x50, those two numbers do show up unusually often. But mostly on odd bytes. So what did the even byte mean? And then it clicked…. run-length encoding! Those Apple guys are so clever! Run-length encoding (RLE) is a very simple compression algorithm where long sequences of the same byte are replaced with a pair of bytes: (count, value). So the first two bytes, FF 01, are code for a sequence of 255 0x01 bytes. I first saw this technique used in when writing a DOS graphics program using the Allegro game programming library years ago, and it’s apparently used in fax machines, too.
Okay, so RLE was a good theory, but it’s time to verify it. Using a Ruby script, I was able to decode the bytes from 0x011140 through 0x01169F as RLE. And sure enough, this data matched my appleboot.raw file I extracted from BootX. Full jackpot! I now had the palette and pixel data. Now could I replace the image?
Due to the RLE compression, you can’t just stick any old 128x128 image in there, like BootX. No sir. Apple made it much more difficult to customize the image, as it must compress down to 1,376 bytes or less. And this was no easy task. Nearly all of the boot images on Res Excellence are way too complicated to compress down that small. However, one stuck out: the Adventure chalice from Patrick Deuley’s Atari collection:

First off, I love Adventure, so this would be perfect for my MAME machine. Plus, it had only 2 colors and large contiguous blocks of the same color, which should compress nicely. To keep things simple, I wanted to change the black and yellow to the same light gray and dark gray as the Apple logo. Using Photoshop, as in the BootX tutorial, I was able to use the clut.act palette and change the colors. Also, the original image has some anti-aliasing on the edges. Since this blocky image really doesn’t benefit from anti-aliasing, and the extra colors used for the smoothing would bloat the RLE compression, I removed the smoothing pixels.
Since Photoshop does not understand the RLE compression used, I saved it as a raw image. I wrote a Ruby script to compress the raw image into an RLE image. Luckily, the image compressed down to 622 bytes, so it would easily fit within the alloted 1,376 bytes of the original image. Instead of modifying original boot.efi, I used a copy, called “chalice.efi”. Using a hex editor on chalice.efi, I overwrote the chalice’s RLE bytes on top of the original Apple logo. Now, I needed to test out this modified boot loader.
The bless(8) command allows you to change the boot loader for a volume. This means I could use chalice.efi while keeping the original boot.efi completely intact. As it turns out the Startup Disk pane of System Preferenes also uses bless (or some equivalent API) to re-bless the original boot.efi. If I messed something up, I could boot to the original OS X DVD, and run the Startup Disk utility. I created a new directory, and copied my boot loader there:
% sudo mkdir /efi
% sudo cp chalice.efi /efi
One final detail needed to be covered before running bless. The startup boot menu invoked when holding down the Option key uses a special file to display the volume name below the icon, called the volume label. Since the --label option of bless is currently broken, I’ll just use label file used by boot.efi:
% sudo cp /System/Library/CoreServices/.disk_label /efi
% cd /efi
% sudo bless --folder . --file chalice.efi --labelfile .disk_label
Now, time to reboot to see if all this hex hacking actually worked:
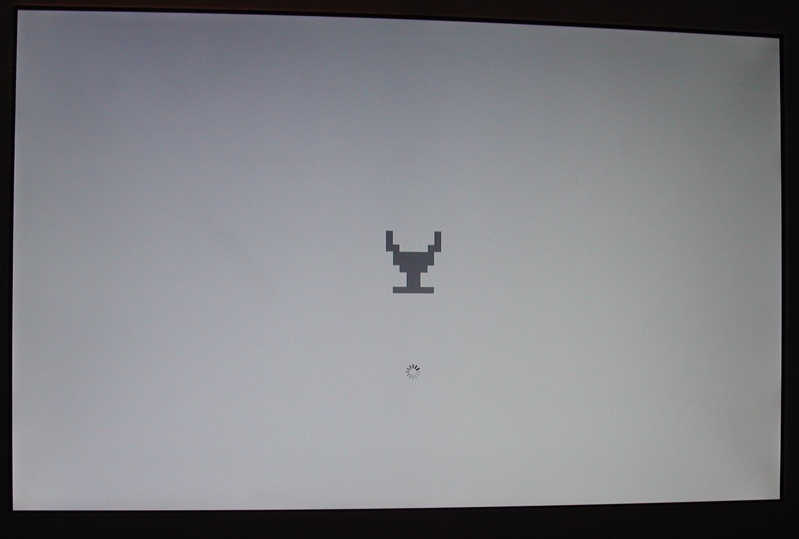
Holy crap, it did! This will make a nice detail on my MAME arcade cabinet experience. And it was fun to figure out, too.