Eclipse CDT for Snes Dev
WIP
This tutorial is a fast step by step on how to setup Eclipse CDT to use the WDC tools to create a valid SNES rom. First you need to install Eclipse CDT. There is basicly 2 way to do this. If you already have Eclipse installed somewhere without the CDT plugin you just need to install them. There is various place on the web that learn you how to do this, here by example.If you have not Eclipse yet on your computer it’s certainly best to download an Eclipse with the CDT plugins all in One. You can get a such package here.
Once you hace an Eclipse with CDT up and running, there is still some piece of software needed. The CDT plugin don’t come with the make executable that allow you to process the Makefile that will make your rom compiling more efficient. So if you don’t have yet GNU Make installed on your computer, you can get it here. You decompress the archive at some place on your harddisk. On my part I installed it in C:\UnixUtils\. Then you should add C:\UnixUtils\usr\local\wbin in your system path by hand.
You should also install the FreeSDK from WDC that is available here. I personnaly installed it in C:\65xx_FreeSDK.
I will now explain how to create a new project and will use my current source tree to build the rom.
Create a new project
File -> New -> C Project
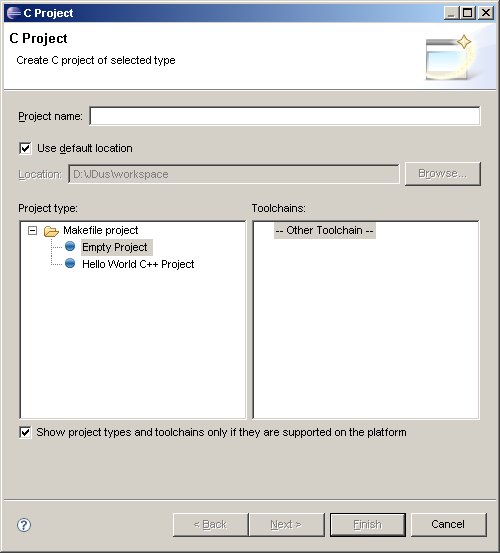
Click on Next >
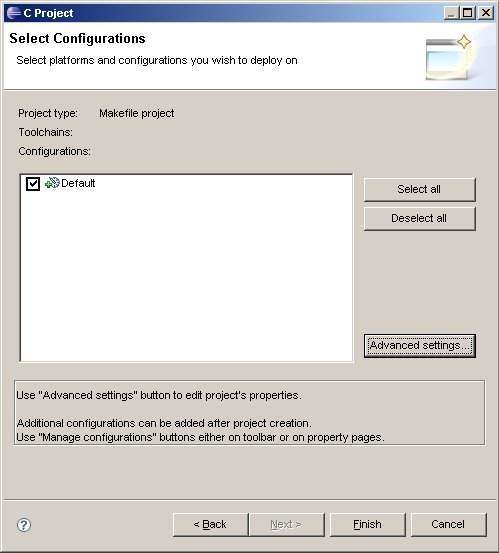
Click on Finish
Config project
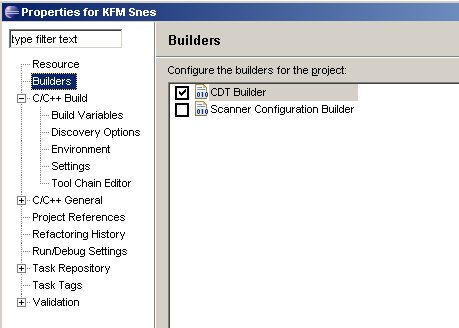
Now we are about to configure a few things in our project.
- Setup Builders : Check CDT Builder and check out Scanner Configuration Builder.
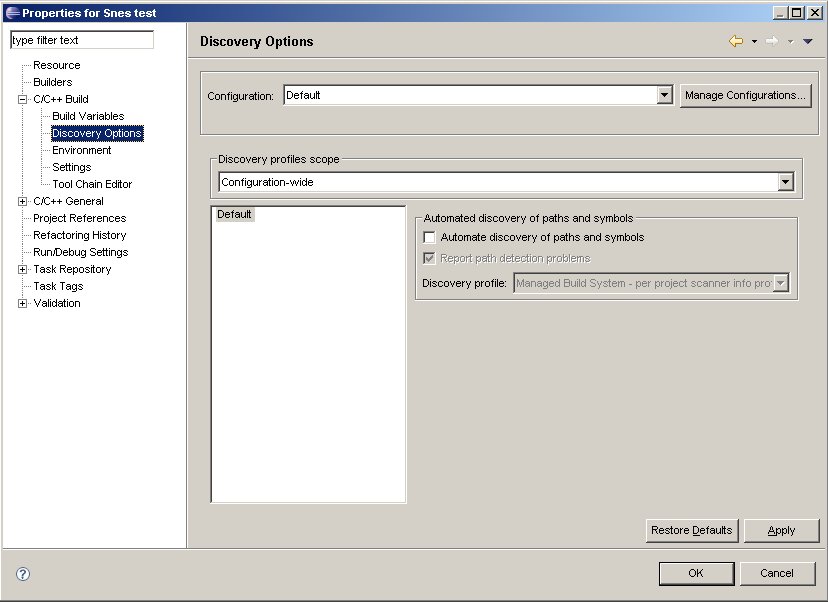
- Setup C/C++ Build -> Discovery Options : Check out Automate Discovery of path and symbols.
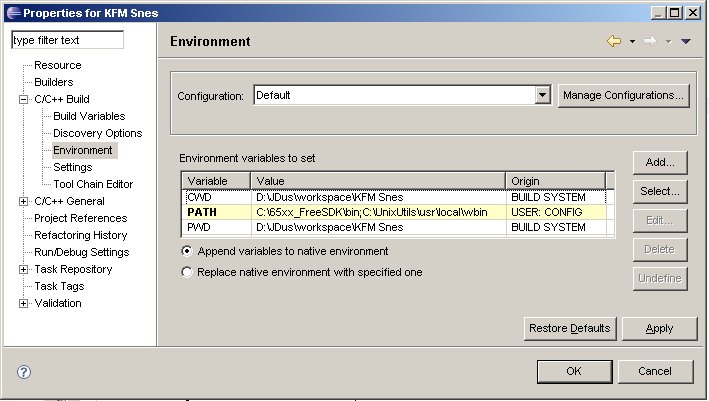
- Setup C/C++ Build -> Environnement : Add PATH with the path of your WDC Binaries and UnixUtils binaries (check Append variable to native environnement).
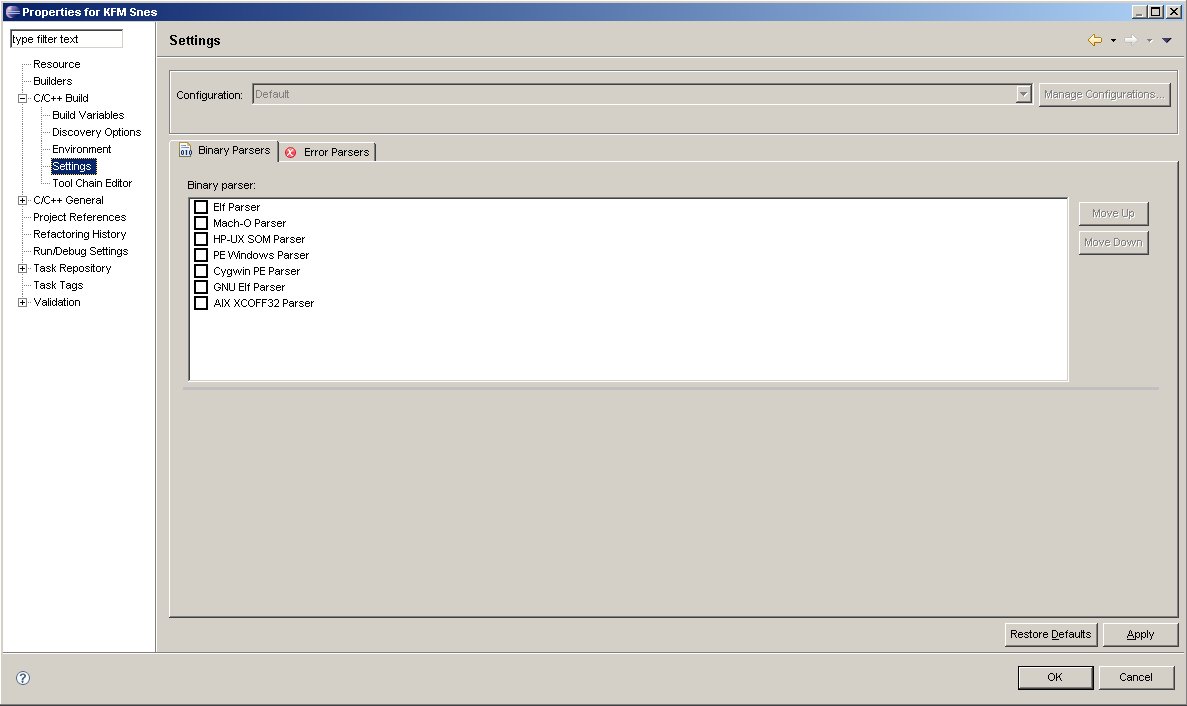
- Setup C/C++ Build -> Environnement /Binary Parsers: Check out all parsers.
- Setup C/C++ Build -> Environnement / Error Parsers: Only check CDT GNU C/C++ Error Parser and CDT Make Error Parser, check out all the other.
- Setup C/C++ General-> Paths and Symbols / Includes / GNU C : add the includes directory from WDC Compiler.
All of the above is shown here under (click on the image to see it full size) :


Put files in your project
From here there is two choice : Either you get my full example project [INSERT LINK] or you just get the basic project that includes Makefile, StartupSnes.Asm and a almost blank main.c files that is settings basic stuff for the SNES and provide rom declaration and some basic Handler.
To show “make targets” view
Window -> Show View > Make Targets
Add make targets
right click on project -> Add Make Target
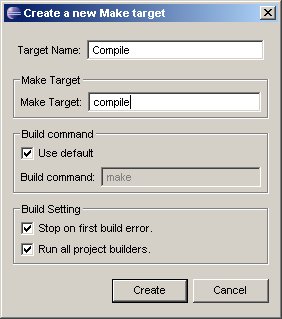
add 3 targets Clean, Compile and Ressource
You are now ready to compile the project. The first time I recommand to clean the build by double clicking on the clean make target. Then you can make the ressource, the ressource need to be processed when you change something in your graphics. And now the final touch … Compile. This will make your project and produce a rom.smc that from here you can either run in your prefered emulator or sending it to your SNES/Backup Unit.
There is a way to automate the launch of the Emulators. You just need to configura an entry in the Launch External Tools from Eclipse.
[INSERT IMAGE]
Getting familiar with the makeFile
Here is the simple Makefile from the basic project :
ERASE=del

CC=wdc816cc
AS=wdc816as
LN=wdcln

SRC_C= $(wildcard *.c)
SRC_ASM= $(wildcard *.asm)

OBJ= $(SRC_C:.c=.o)
OBJ+= $(SRC_ASM:.asm=.o)

all: rom.smc

rom.smc : $(OBJ)
	$(LN) -HB -M21 -V -T -PFF \
		-C008000,0000 \
		-D003000,050000 \
		-U0200,0000 \
		-Avectors=FFE4,7FE4 \
		-Aregistration_data=FFB0,7FB0 \
		-N \
		$(OBJ) \
		-LC:\65xx_FreeSDK\lib\cs -O rom.smc
	tools\padbin.exe 0x40000 rom.smc

%.o: %.c
	$(CC) -wl -wp -sop -MS $< -o $@

%.o: %.asm
	$(AS) -V $< -o $@

ressource: ressource/*
	#tools\Pcx2Snes.exe ressource/kungfu -n -c16 -screen

clean:
	-$(ERASE) *.o
	-$(ERASE) *.usage
	-$(ERASE) *.map
	-$(ERASE) *.smc
We start by the easiest parts : ressource and clean targets. What you see here is quite straight forward, you simply list the commands you need to be executed when launching the target. So here with ressoure we rebuild ALL the ressource (the current example is commented just remove # and change the paths). While the clean target will try to clean everything that is going to be made with the compile target.
The compile target will check for every .c and .asm files in the main directory and compile them with the WDC Compiler and Assembler. Then when everything is compiled it will link everything up and output a rom.smc.When you will start to have a bigger project you might need to play a bit with the linker (wdcln) options to set the section at the right place in ROM.
Note that you may need the padbin.exe to have a good rom size to run in most of the good compilers. This executable is in the full and basic example package, you will also found the pcx2snes.exe graphic convertor in the tools directory.
You are now ready …
I think that now you have everything in handsto start coding the SNES in C. This is not a tutorial on how to code in C for the SNES, that will come a bit later, from now i suggest you to play with my previous code release or make your own.
If you make anything that might get a better configuration or a better Makefile, don’t hesitate to make a comment or to send me an email. I also idle most of the time in #snesdev on efnet irc servers.
Enjoy,
Lint